DNN OAuth Single Sign On
DNN OAuth Single Sign On module allows login/Single Sign-On (SSO) with your Azure AD, AWS Cognito, Invision Community, Slack, Discord or other custom OAuth 2.0 providers. DNN Oauth Single Sign On works with any Identity provider that conforms to the OAuth 2.0 and OpenID Connect (OIDC) 1.0 standard.
DNN OAuth Single Sign On module allows login/Single Sign-On (SSO) with your Azure AD, AWS Cognito, Invision Community, Slack, Discord or other custom OAuth 2.0 providers. DNN Oauth Single Sign On works with any Identity provider that conforms to the OAuth 2.0 and OpenID Connect (OIDC) 1.0 standard.
DNN OAuth Single Sign On module allows login/Single Sign-On (SSO) with your Azure AD, AWS Cognito, Invision Community, Slack, Discord or other custom OAuth 2.0 providers. DNN Oauth Single Sign On works with any Identity provider that conforms to the OAuth 2.0 and OpenID Connect (OIDC) 1.0 standard.

Use cases supported with our SSO module
Windows Authentication (SSO)
DotNetNuke (DNN) OAuth Single Sign-On (SSO) module has support for Integrated Windows Authentication(IWA). Integrated Windows Authentication is the preferred approach to authentication whenever users are part of the same Windows domain as the server. Users are authenticated against an existing identity store such as Active Directory which gives seamless login experience.
Single Sign-On (SSO) into Multiple DotNetNuke sites
DotNetNuke SAML Single Sign-On (SSO) module also supports login into multiple DotNetNuke sites with one set of credentials using SAML protocol. Once the user will be logged into one of the DNN sites, he/she will be logged into to other DNN sites automatically that is no need to enter login credentials for other sites again.
Single Sign-On (SSO) into single DotNetNuke (DNN) site
DotNetNuke(DNN) SAML Single Sign-On (SSO) module helps you to add functionality for Single Sign-On (SSO) to your DotNetNuke site. Our module enables users to securely authenticate with multiple applications and websites by logging in only once—with just one set of credentials (username and password).
Multi Factor Authentication (MFA) for passwordless login to your DotNetNuke site
Secure your DotNetNuke site from password thefts using multi-factor authentication (MFA) methods with 15+ authentication types provided by miniOrange. Our multi-factor authentication (MFA) methods prevent unauthorized users from accessing information and resources having password alone as an authentication factor. Enabling second-factor authentication or two factor authentication(2FA)for your DotNetNuke site protects you against password thefts.
IP blocking for your DotNetNuke (DNN) site
miniOrange helps you to add IP blocking/IP restriction to your DotNetNuke (DNN) site which adds extra security to DotNetNuke (DNN) site. In this, we provide you option for IP blocking which includes both automatic (based on user behavior) and manual IP blocking which includes blacklisting and whitelisting of IP addresses to provide access restriction, the office only access, intranet access & network restriction
Adaptive Authentication
Using Adaptive Authentication you can also restrict the No. of devices the end user can access the Services on. You can allow end users to access services on a fixed no. of devices. The end users will be able to access services provided by us on this fixed no. of devices.
Key Features
Single Sign On
Easy and seamless access to all resources. Login to your DotNetNuke (DNN) site via any existing OAuth / OpenID provider that conforms to the OAuth 2.0 and OpenID Connect (OIDC) 1.0 standard.
Role Mapping
Map your Identity Provider roles to your DNN roles and restrict resources to specific roles.
Protect complete Site
You can restrict your site to only logged in users by redirecting the users to your IdP if logged in session is not found.
Multiple OAuth / OpenID Connect Provider Support
Support for adding login with one or more OAuth / OpenID Connect Providers.
Attribute Mapping
Offers you to map the attributes from your IdP to your DotNetNuke user attributes.
Account Linking
After user SSO to DNN, if user already exists in DNN, then his profile gets updated or it will create a new DNN User.
Multi-Portal Support
Add support for login to your all DoteNetNuke (DNN) parent as well as child portals using your Identity Provider credentials.
Plans For Everyone
-
FREE
$ 0 - DOWNLOAD NOW
- See the Free Plugin features list below
- Unlimited Authentications
- Basic Attribute Mapping (Username, Email)
- Auto Create Users
- Account Linking
- Basic Role Mapping
- Login Widget
- -
- -
- -
- -
- -
- -
- -
- Support
-
PREMIUM
$ 449* - Upgrade Now
- See the Premium Plugin features list below
- Unlimited Authentications
- Basic Attribute Mapping (Username, Email)
- Auto Create Users
- Account Linking
- Basic Role Mapping
- Login Widget
- Advanced Attribute Mapping(Firstname Lastname etc.)
- Multiple OAuth / OpenID Connect Provider Support
- Custom Role Mapping
- Custom Attribute Mapping
- Force Authentication / Protect Complete Site
- Customize Login Widget
- Custom Redirect URL after Login/Logout
- Support
Steps to Configure DNN OAuth Single Sign On
Step 1: Download and install module in DotNetNuke.
- Download the DNN Oauth Single Sign On module with above link.
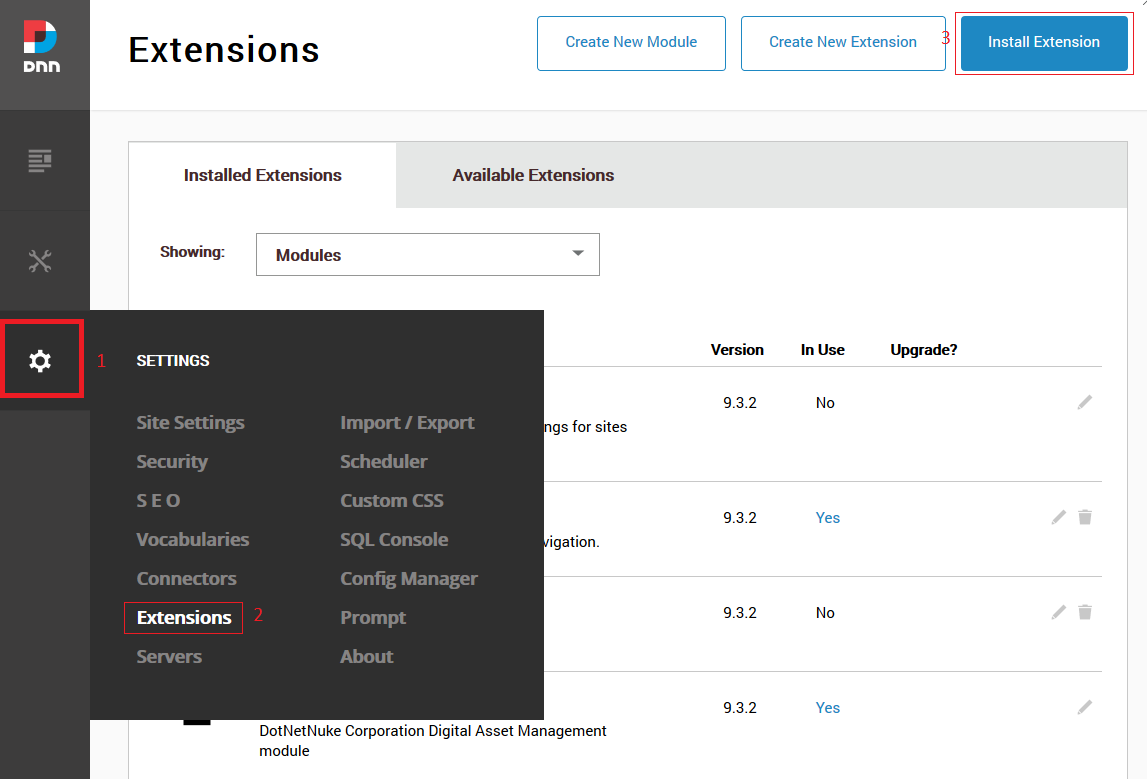
- Extract the package and upload the extension dnn-oauth-single-sign-on_xxx_Install by going to Settings > Extension > Install Extension
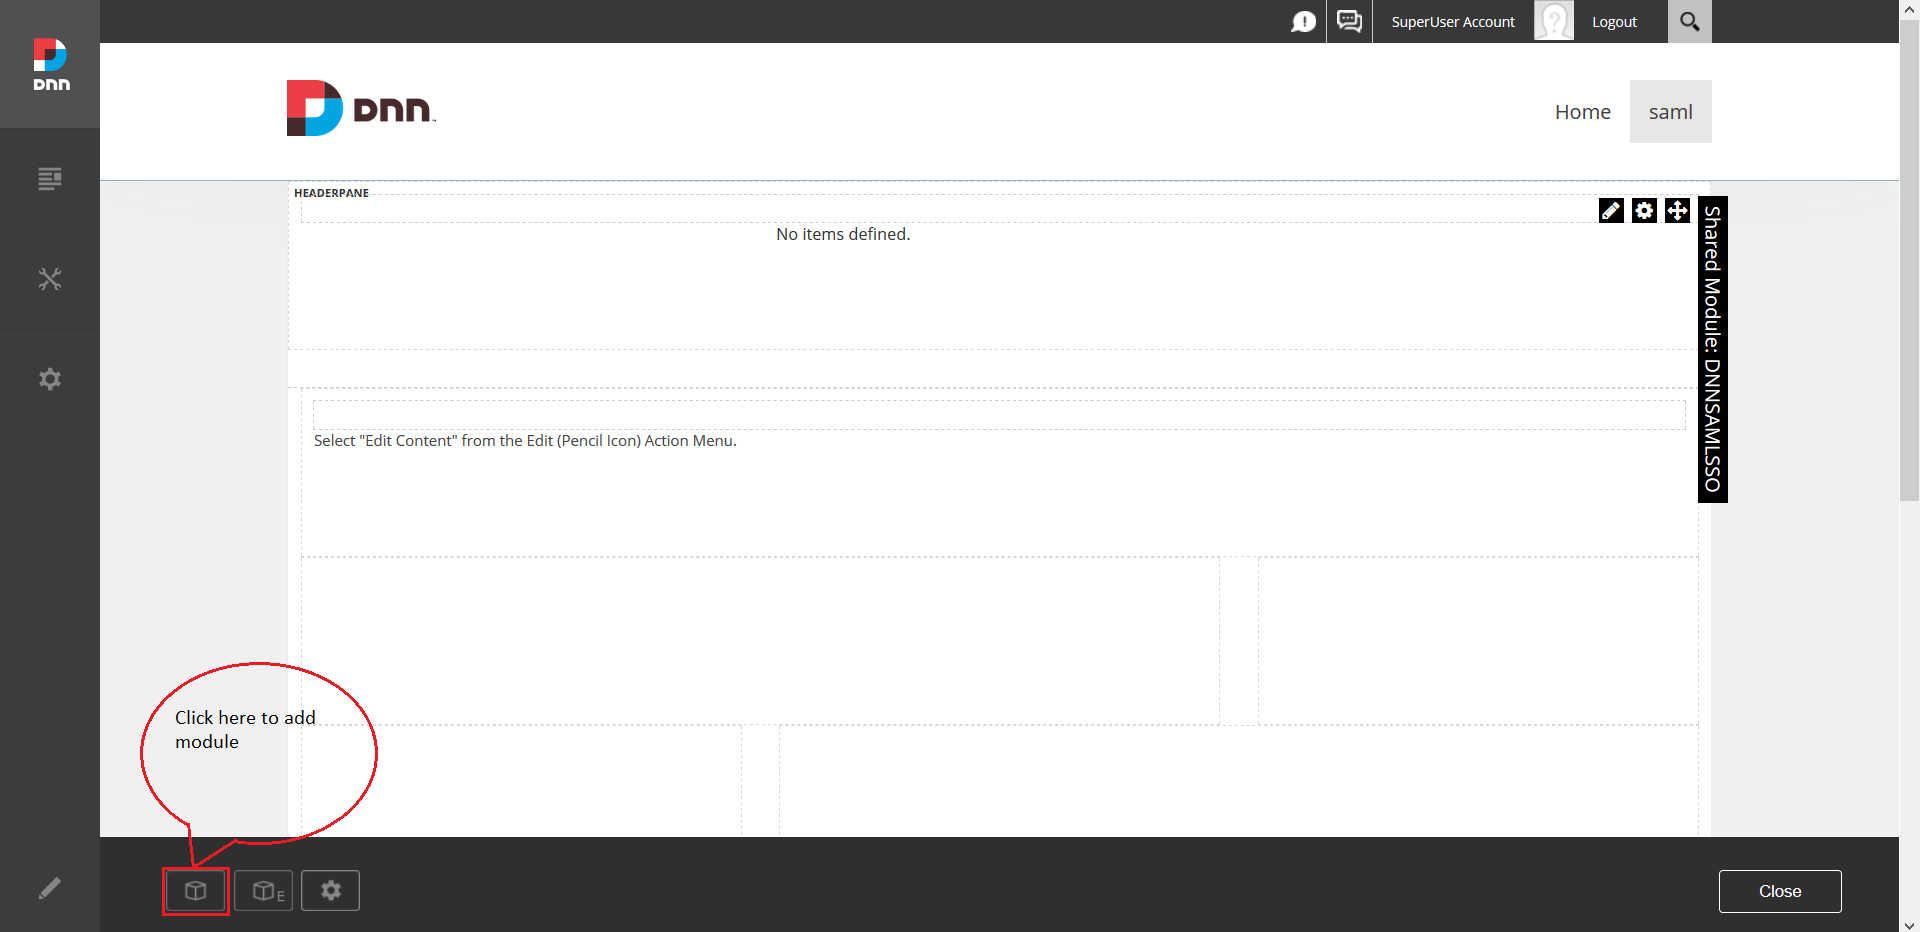
Step 2: Adding Module on DNN page
- Open any of the page on your DNN site (Edit mode) and Click on Add Module .
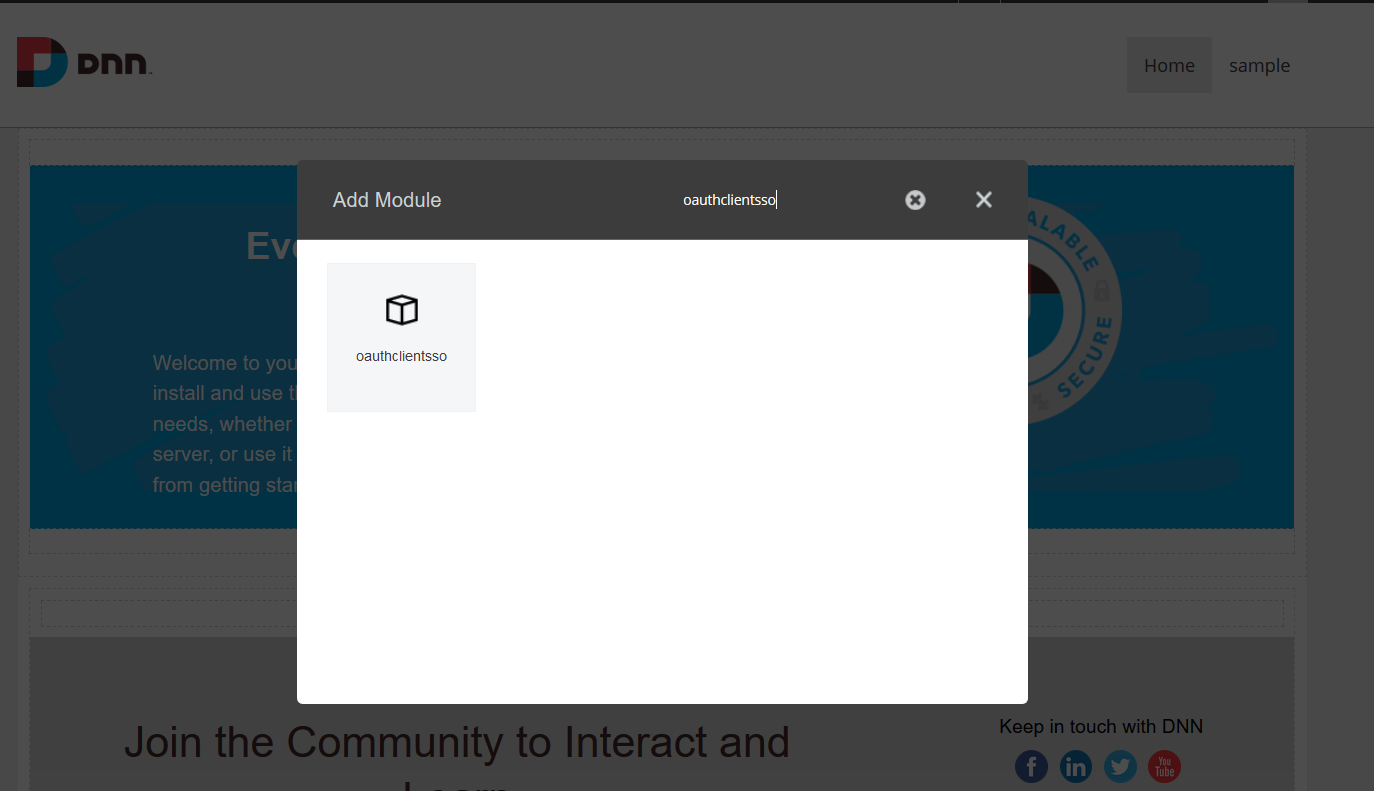
- Search for oauthclientsso and click on the oauthclientsso. Drag and drop the module on the page where you want.
- You have finished with the Installation of the module on your DNN site.
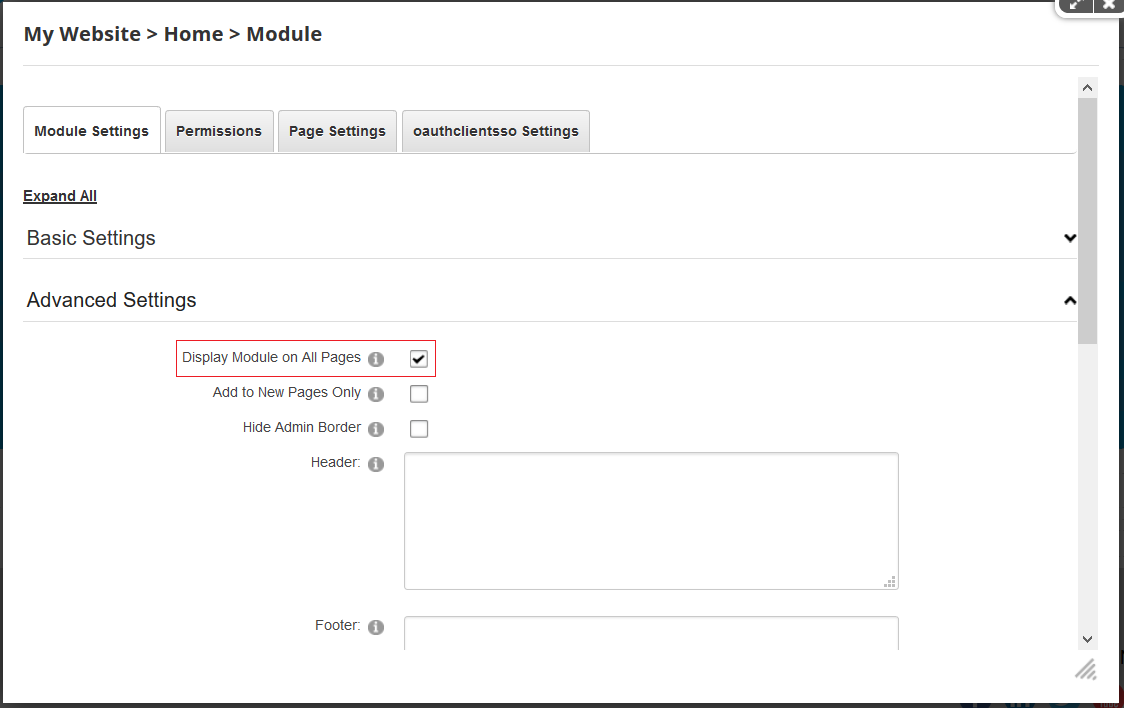
- If you want to add module on every page of your dnn site, go to Module Settings >> Module Settings >> Advanced Settings.
- Check the box for Display Module on All Pages and click on Update.
Step 3: Configuring Module
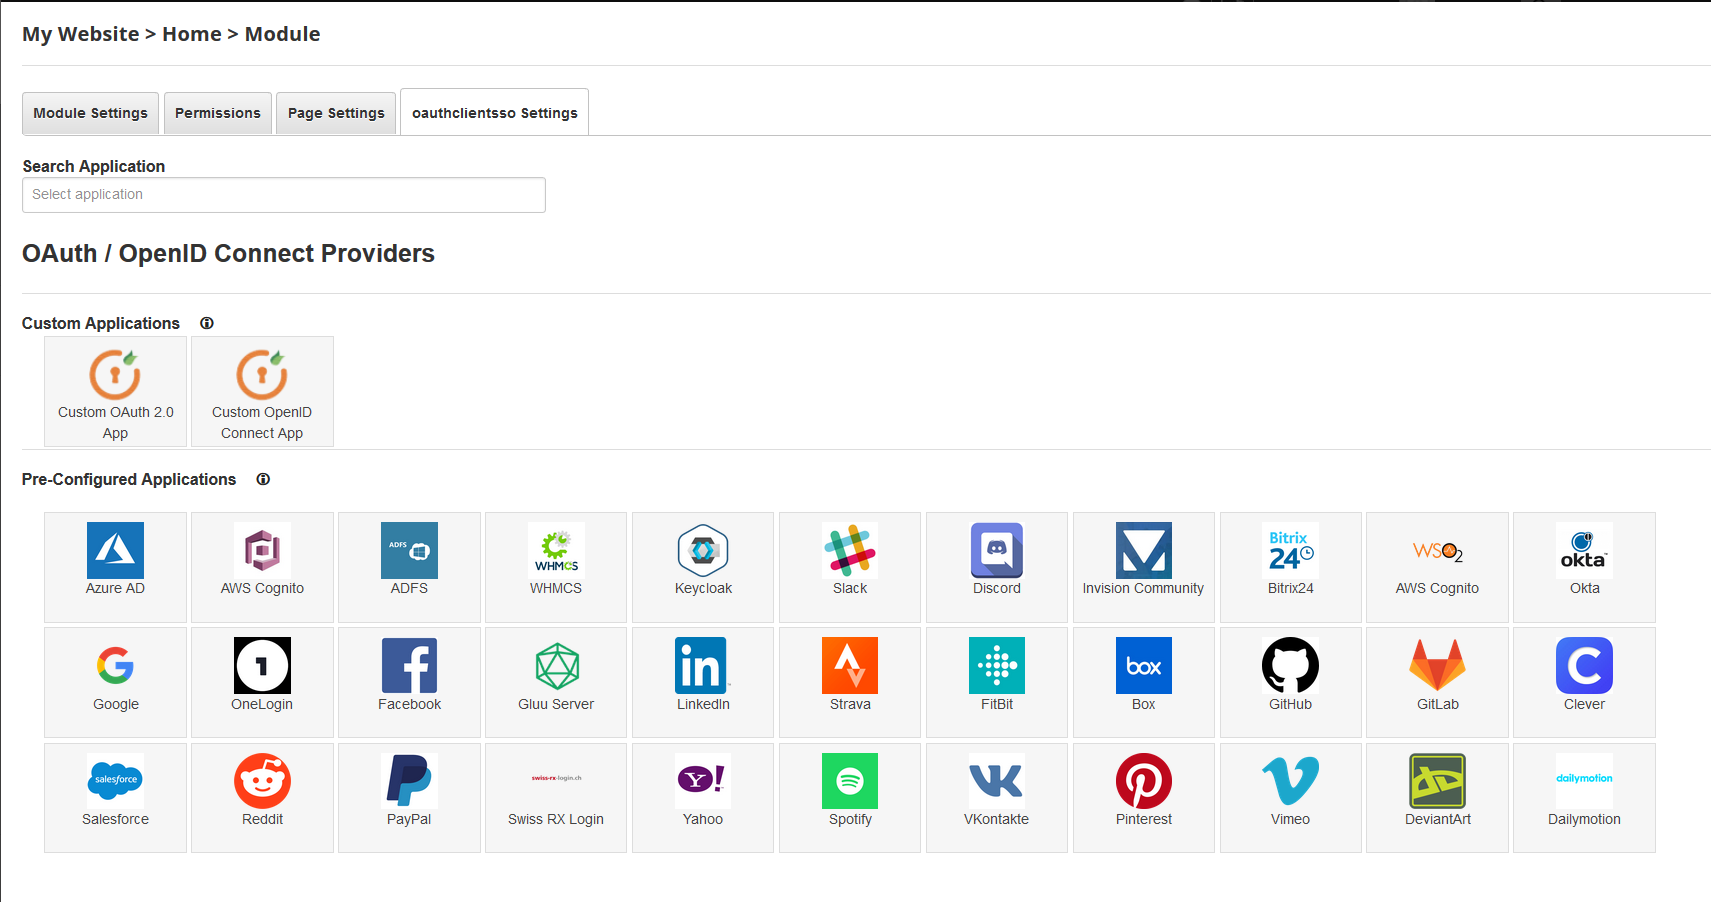
- Go to Module Settings >> oauthclientsso Settings
- You can see the Oauth / Openid providers list.
- Search your OAuth Provider application or click on your OAuth Provider application from the given applications.
- If your Application/ Server Name is not there in default list. You can click on Custom OAuth 2.0 App or Custom OpenID Connect App to add custom OAuth/OpenID Connect Server.
There are two ways for configuring the client:
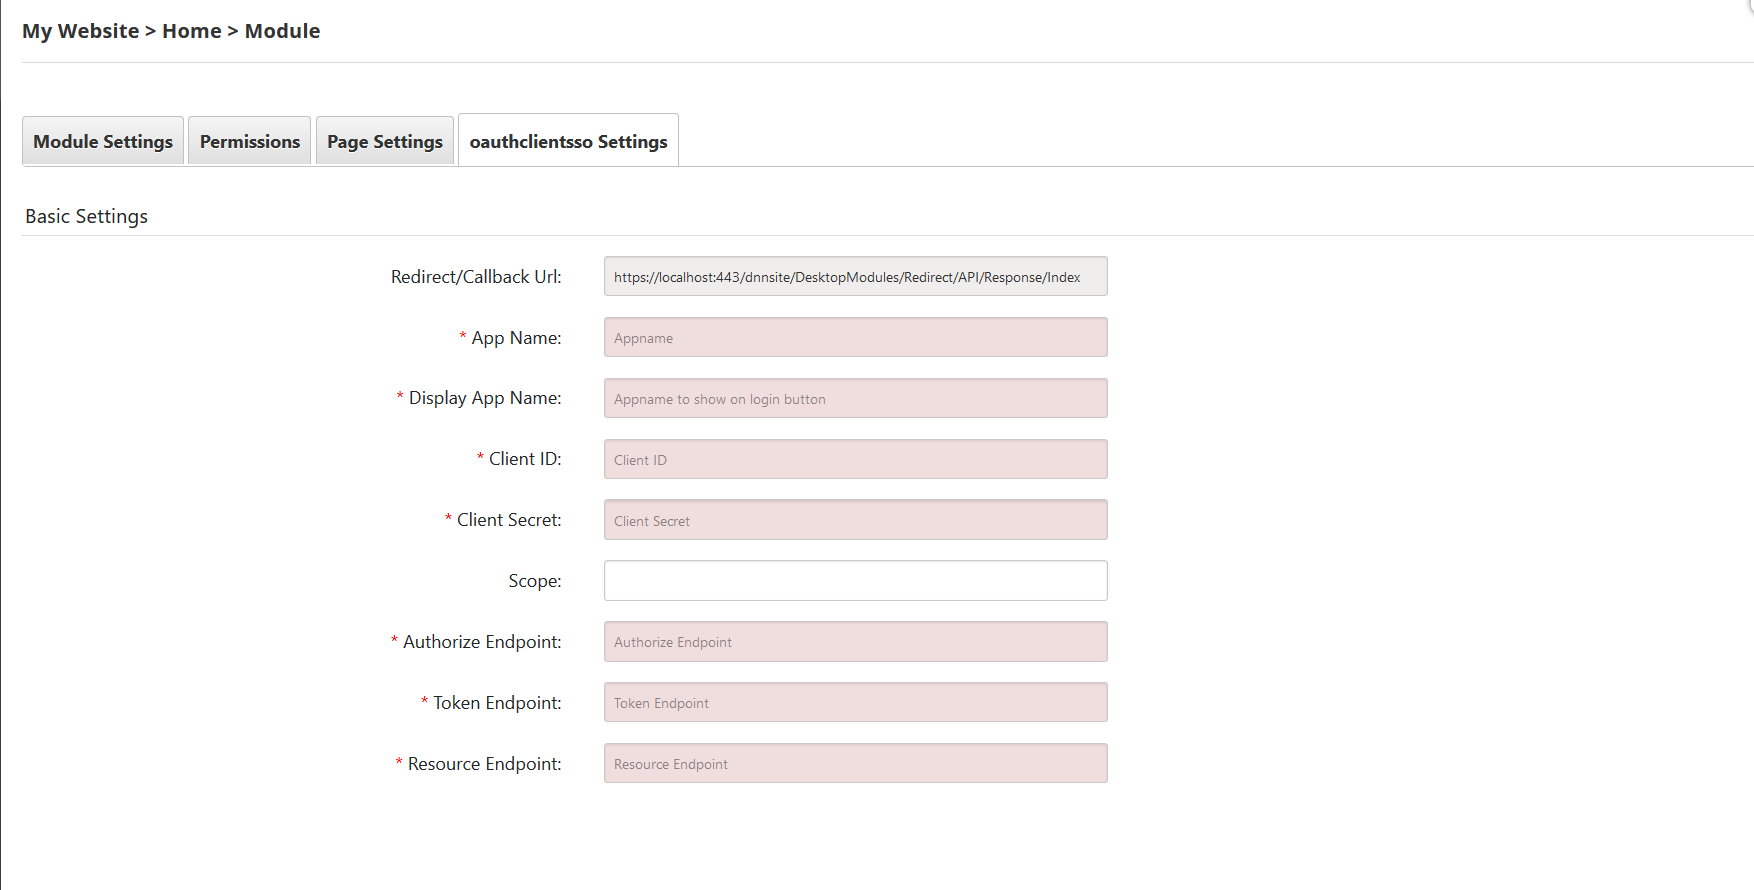
1. If you are using your own Oauth provider- Click on Custom OAuth 2.0 provider.
- You can see the configuration window as below:
- Configure your OAuth provider and you will get Client ID, Client Secret, Authorize Endpoint, Access Token Endpoint and UserInfo Endpoint from your OAuth provider.
- Add the supported scopes by your OAuth provider.
- Note: For Default Applications in the default list, endpoints and scopes are auto-filled. But you can change it if required.
- Copy Redirect/Callback Url from dnn oauth module and configure it in your OAuth provider. Configure other required settings in your OAuth provider.
- Your OAuth provider will provide you with Client / App ID and Client secret. Copy Client/App ID and Client secret and paste it under Client Id and Client secret in dnn oauth module configuration window.
- Confirm you have filled all required fields and click on Update.
Step 4: Test Configuration
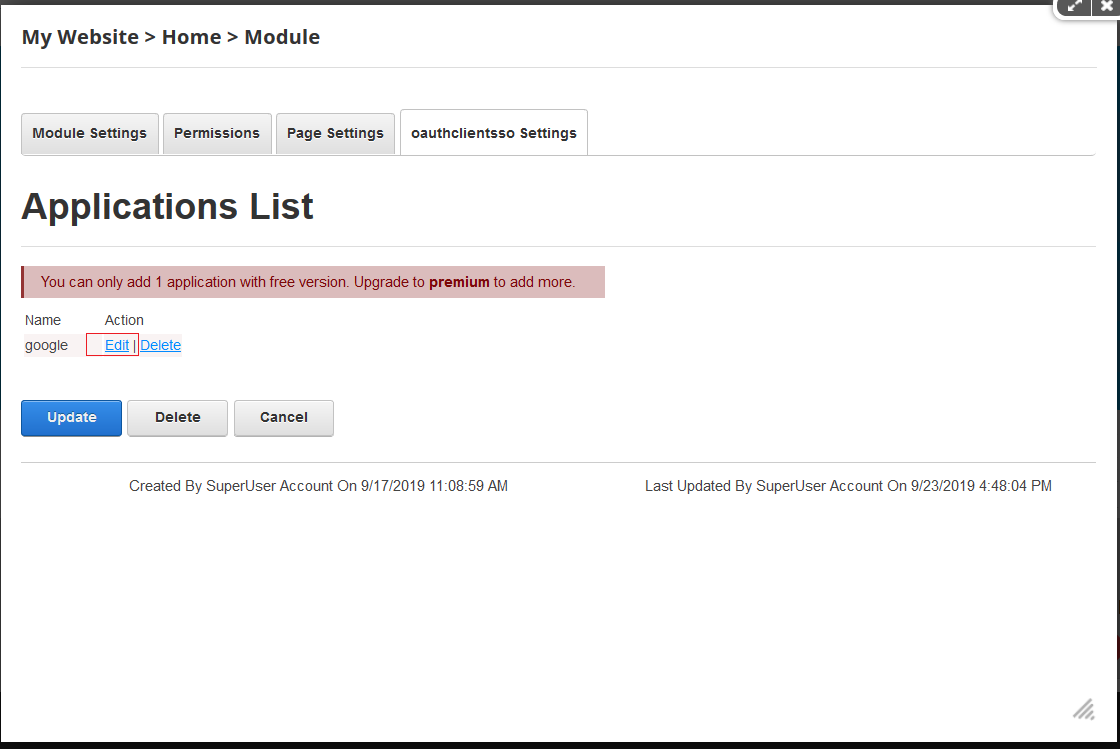
- After saving settings, you can see the list of applications you have configured.
- Click on Edit to update the configuration.
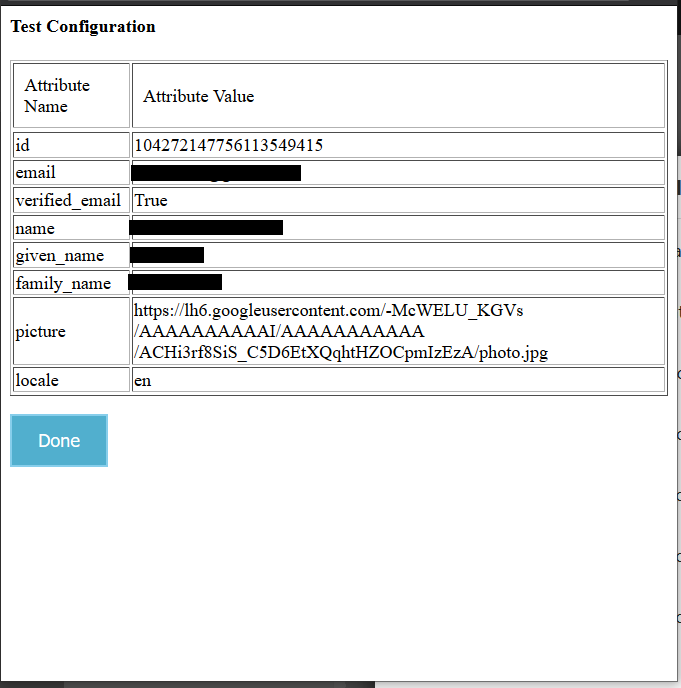
- Click on Test Configuration to check if the configuration is correct.
- On successful configuration, you will get Attributes Name and Attribute Values on Test Configuration window.
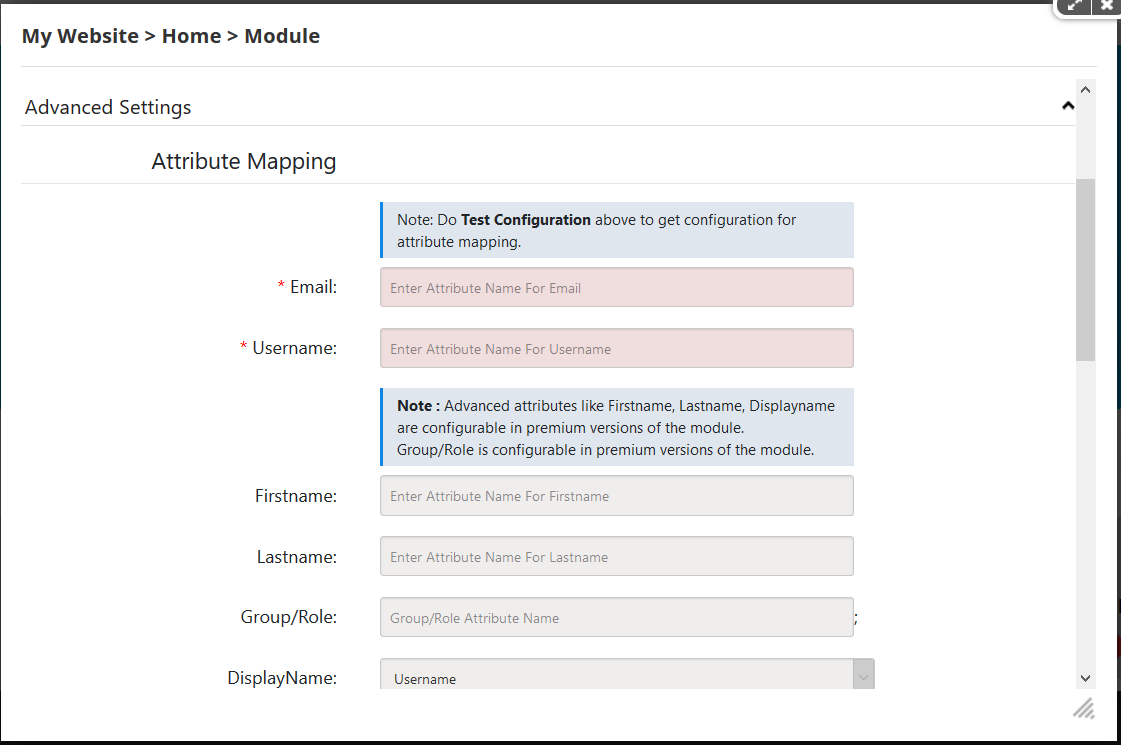
Step 5: Mapping the basic attributes
- Go to the oauthclientsso settings >> Advanced Settings >> Attribute Mapping.
- Map email and username with Attribute Name you can see in Test Configuration window.
Step 6: Adding widget
- For adding the widget go to Add Widget.
- Click on Add Widget button. A button will be added on the DNN page.

List of popular OAuth Providers we support
- Azure AD
- AWS Cognito
- WHMCS
- Ping Federate
- Slack
- Discord
- HR Answerlink / Support center
- WSO2
- Gitlab
- Shibboleth
- Blizzard (Formerly Battle.net)
- servicem8
- Meetup
- Gluu Server
LIST OF POPULAR OPENID CONNECT (OIDC) PROVIDERS WE SUPPORT
- Amazon
- Salesforce
- PayPal
- AWS Cognito
- Okta
- OneLogin
- Yahoo
- ADFS
- Gigya
- Swiss-RX-Login (Swiss RX Login)
For further details:
https://www.miniorange.in//dot-net-nuke-saml-2-0-single-sign-onhttps://plugins.miniorange.in//asp-dot-net-saml-2-0-single-sign-sso-connector
https://www.miniorange.com/dot-net-nuke-saml-2-0-single-sign-on
If you don't find what you are looking for, please contact us at [email protected] or call us at +1 978 658 9387 to find an answer to your question.
Need Help? We are right here!
