Meet us at WordCamp | ShopTalk | DrupalCon Conferences to explore our solutions. Know More
Configure Google Apps As An OAuth Provider(Server) For Joomla
Step 1: Steps to Configure Google Apps as an OAuth Server
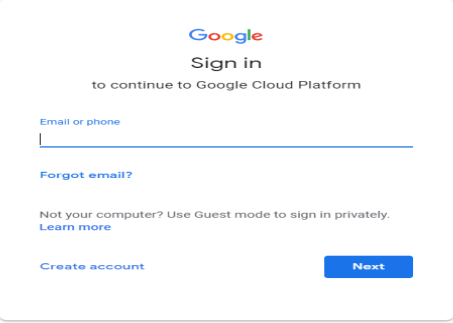
- Go to https://console.developers.google.com/ and sign up/login.
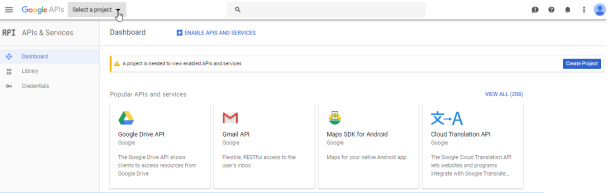
- Click on Select Project to create a new Google Apps Project.
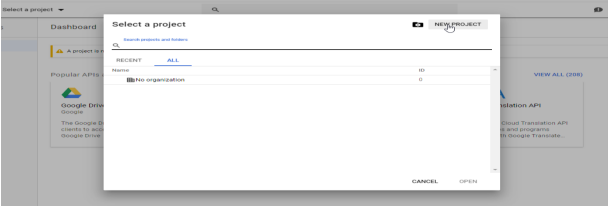
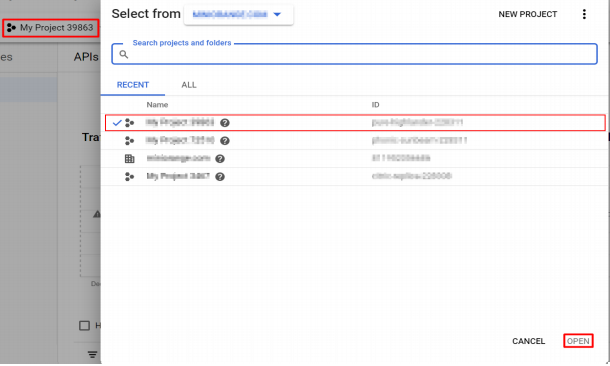
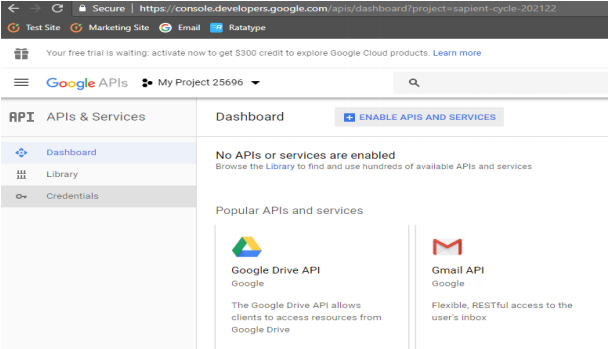
- Click on NEW PROJECT to create a new project or else select one from the existing projects.
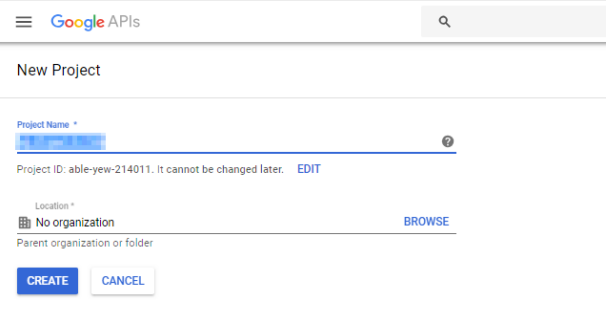
- Enter your Project name under the Project Name field.
- Now, again click on Select a Project (highlighted in the image below) and select the newly created Project by clicking on the project name that you entered in the previous step.
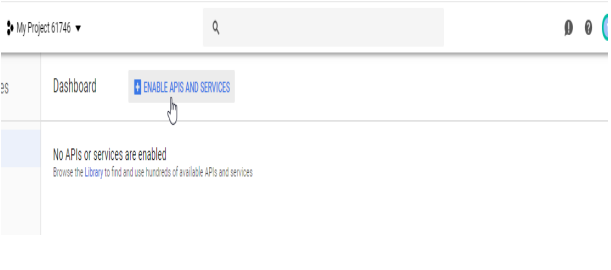
- Click on ENABLE APIS AND SERVICES to enable Google PLUS API.
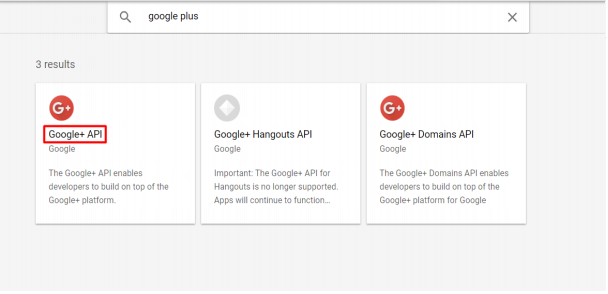
- Search for Google PLUS API in the search bar and click on Google+ API from the search results.
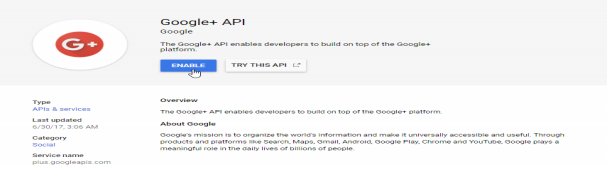
- Click on the ENABLE option to enable Google+ API.
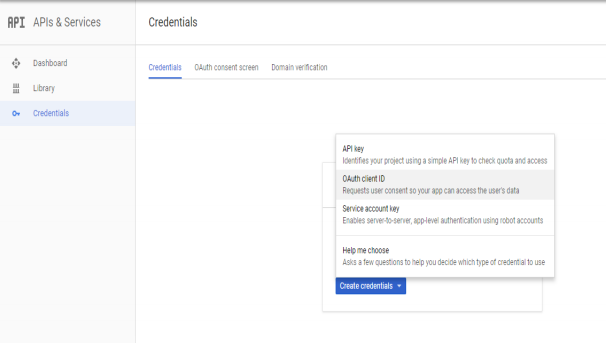
- Go to Navigation Menu APIs & Services Credentials.
- Click on Create Credentials button and then select OAuth Client ID from the options provided.
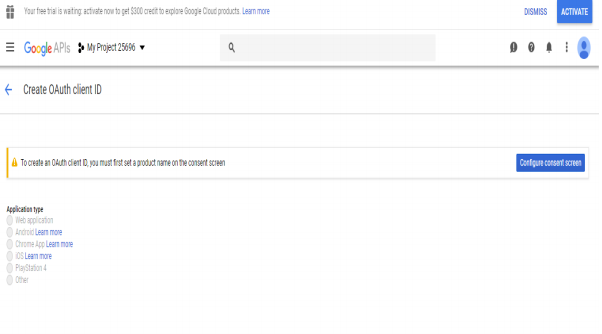
- In case you are facing some warning saying that in order to create an OAuth Client ID, you must set a product name on consent screen (as shown in below image). Click on the Configure consent screen button.
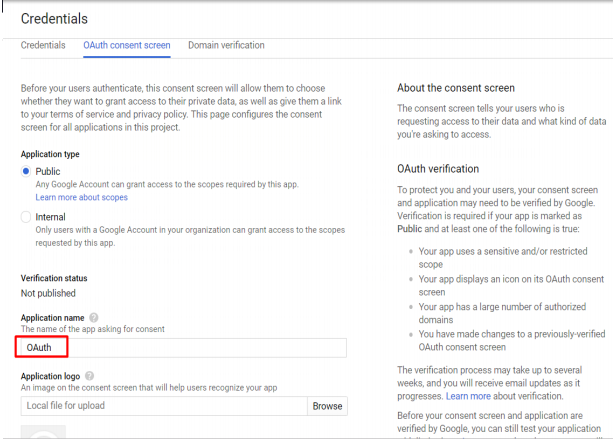
- Enter your product name under the Product Name Shown to Users field. Click on the SAVE button to save your settings.
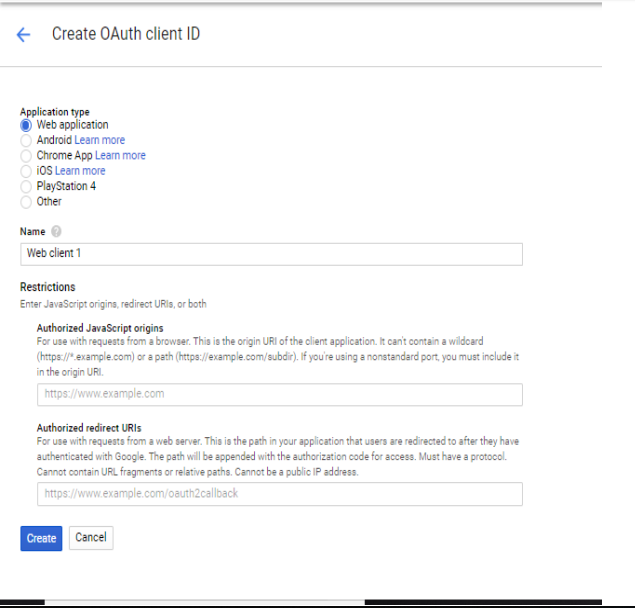
- Select Web Applicationfrom the options below Application Type. Enter the name you want for your Client ID under the name field and enter the Redirect/Callback URI from miniOrange OAuth Client plugin/module under the Authorized redirect URIs field.
- Click on the SAVE button to save your configurations.
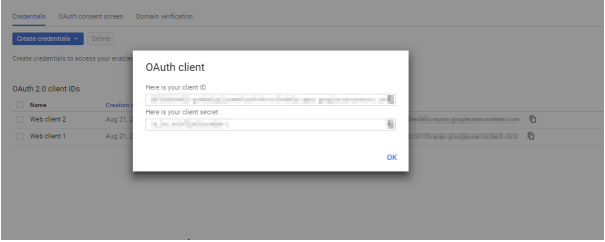
- Copy your Client ID and Client Secret and save it on your miniOrange OAuth Client plugin Configuration.
Congratulations, you have successfully completed your Google App OAuth Server side configurations.
Step 2: Setting up the miniOrange Joomla OAuth Client plugin
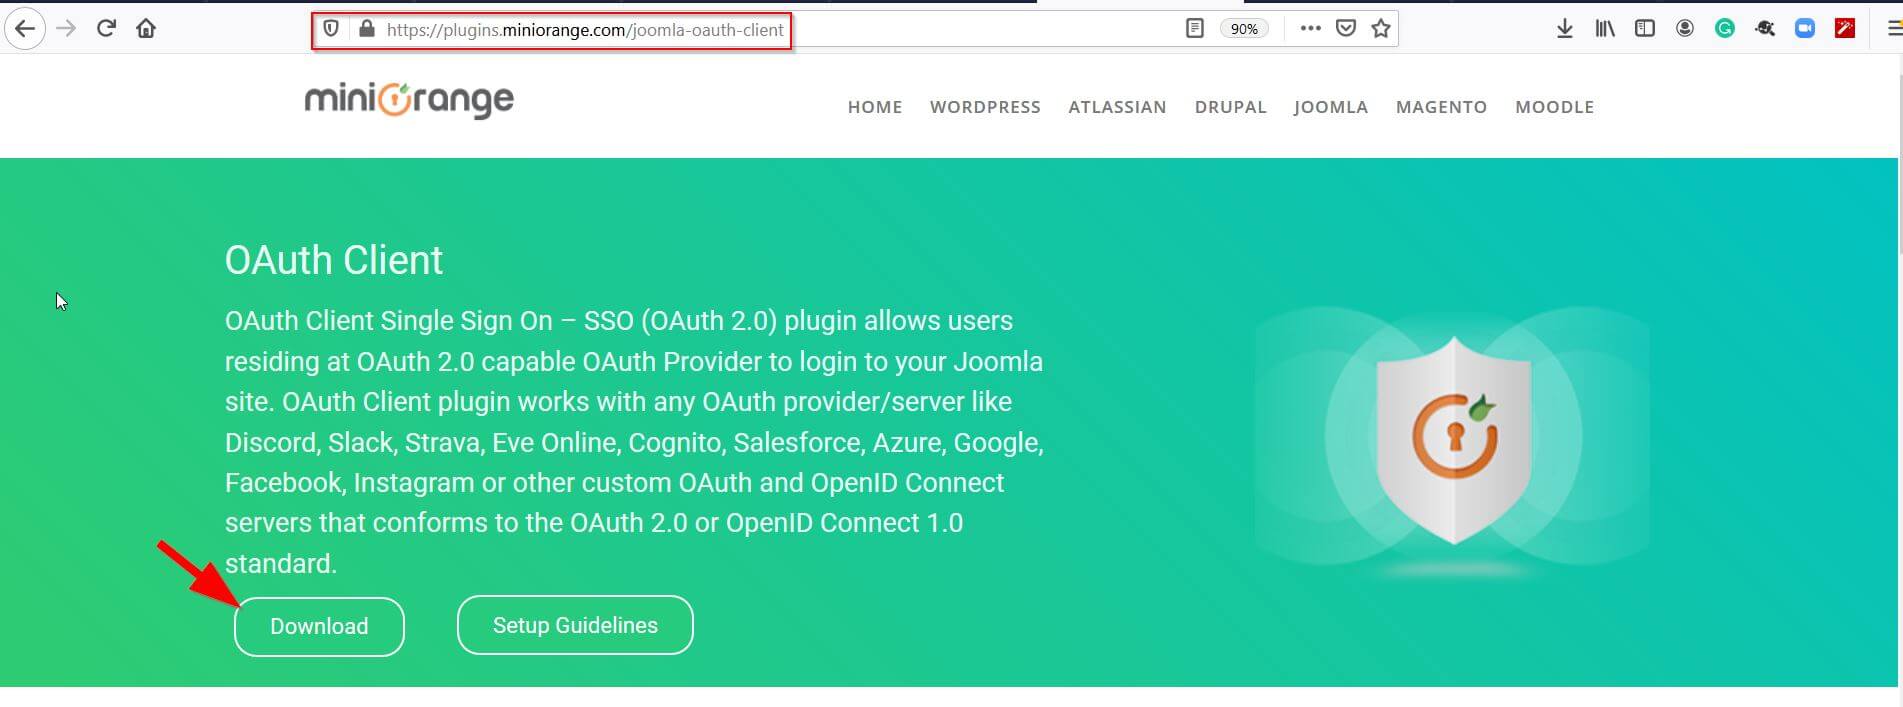
- Download the zip file for the miniOrange OAuth Client plugin for Joomla from the link here.
- Login into your Joomla site’s administrator console.
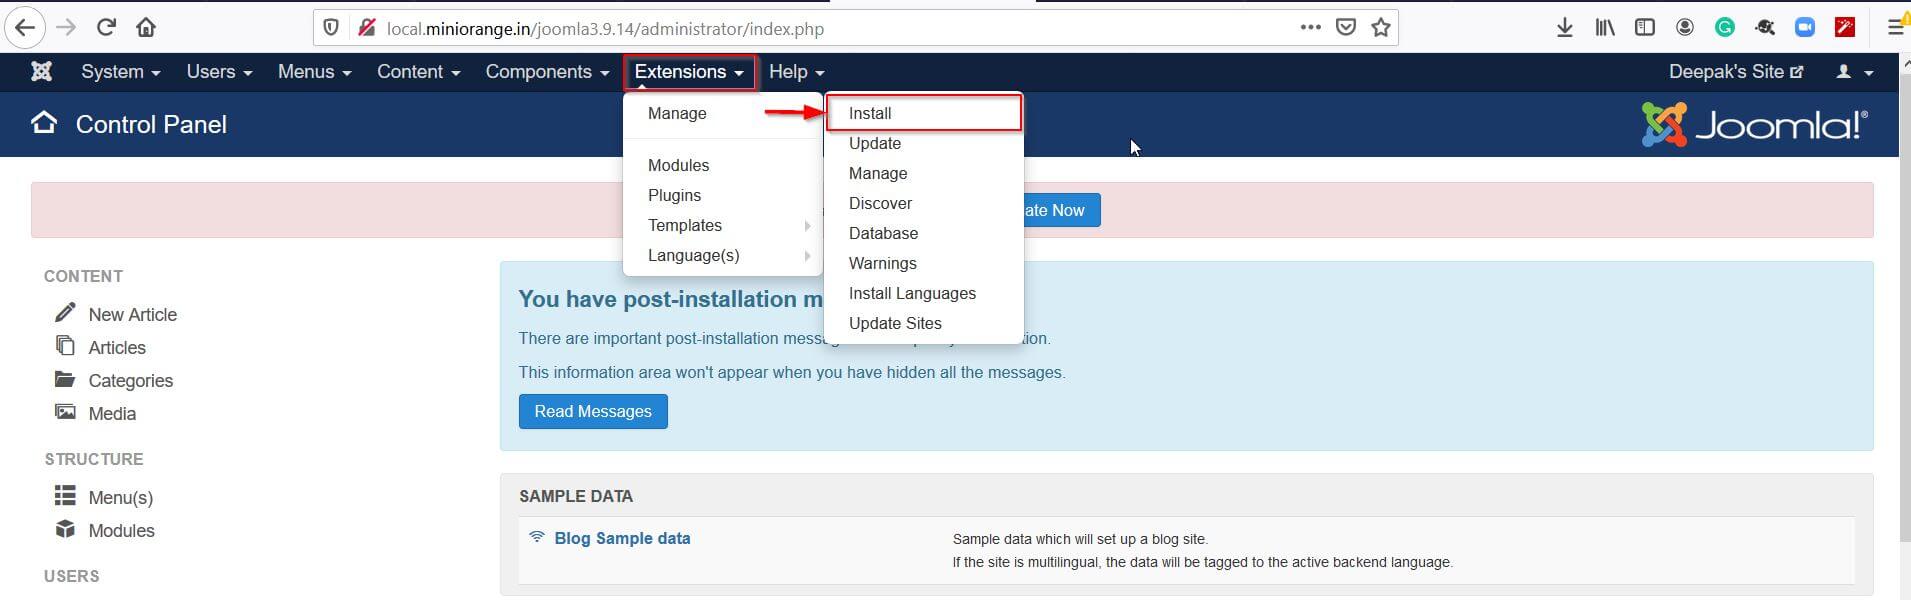
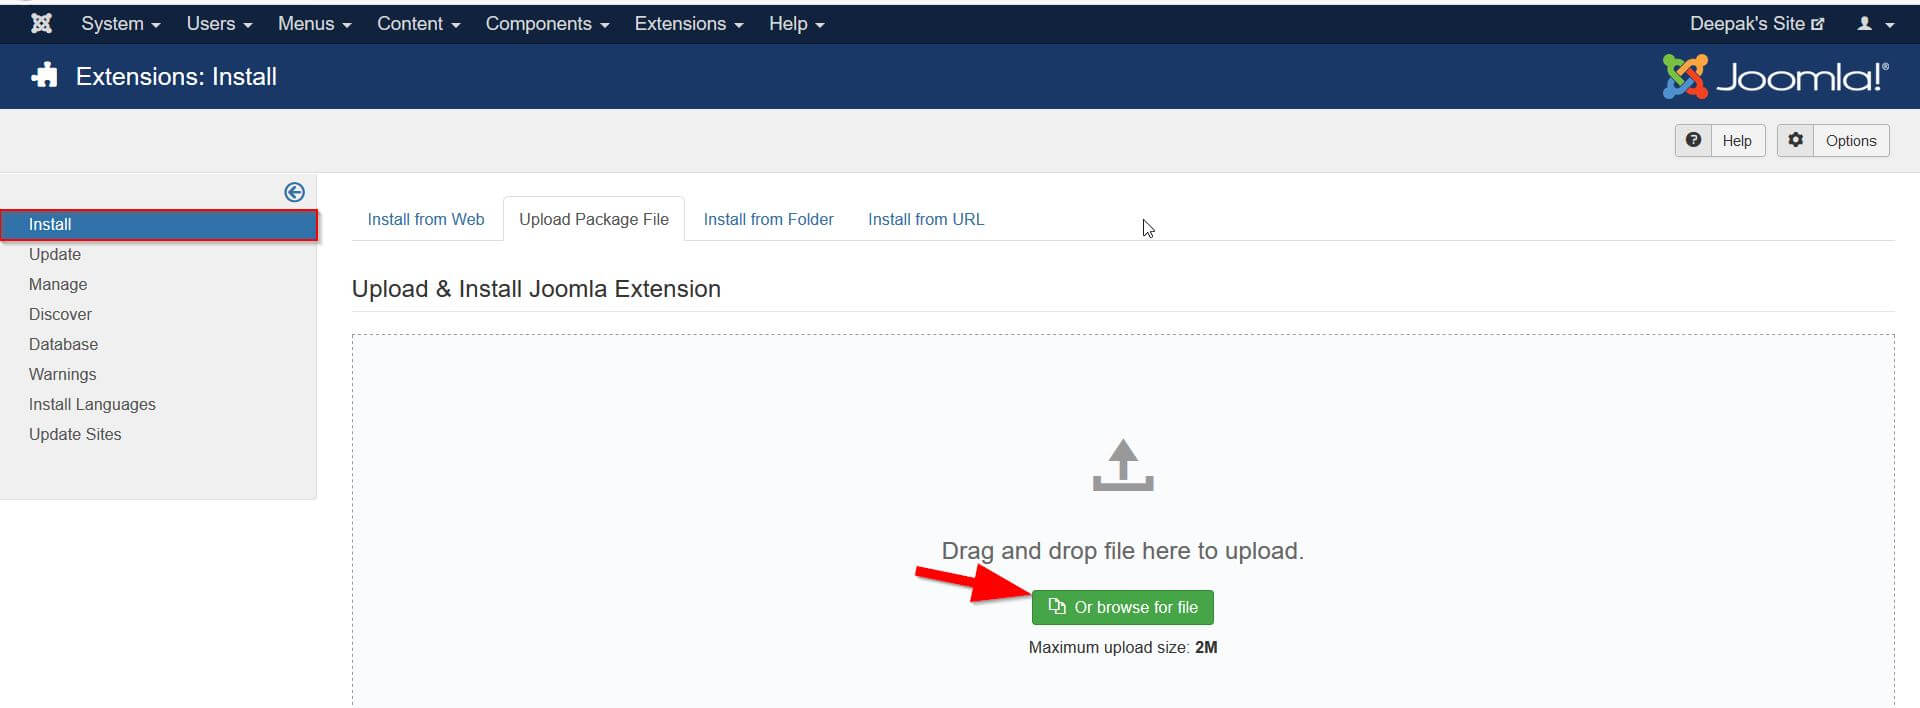
- Go to Extension Manage Install in the top navigation bar to install the plugin.
- Upload the downloaded zip file to install the OAuth Client plugin.
- Navigate to Extensions Manage Manage and search for miniorange in the Search bar provided to see the list of the components.
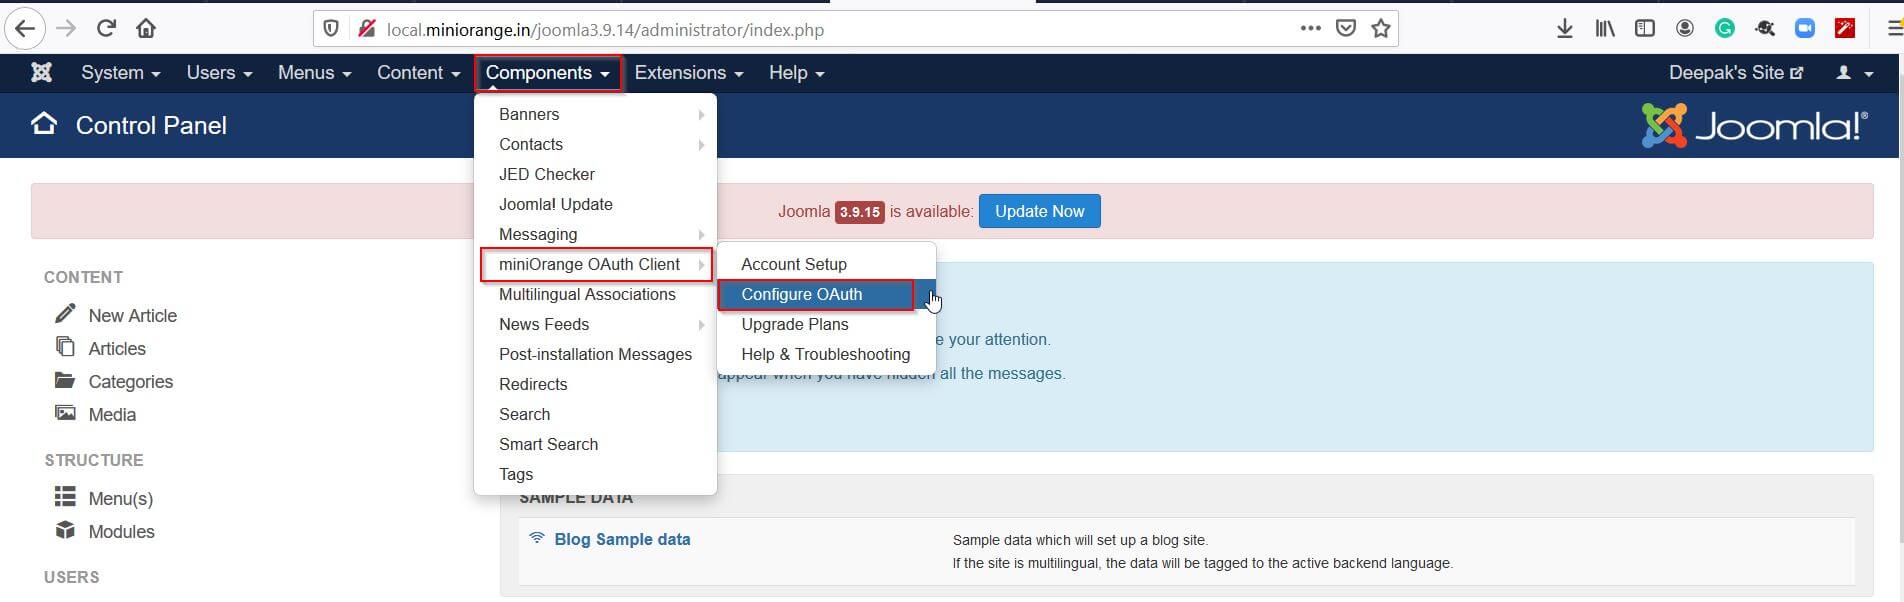
- Go to Components MiniOrange OAuth Client in the top navigation bar to go to the configuration page of the plugin.
- Register/ Login with miniOrange.
- Go to the Configure OAuth tab in the plugin. FIll in the details you received from your OAuth Provider and click on the Save Settings button.
- Copy the Redirect/Callback URL given in the plugin and save it in your OAuth Provider.
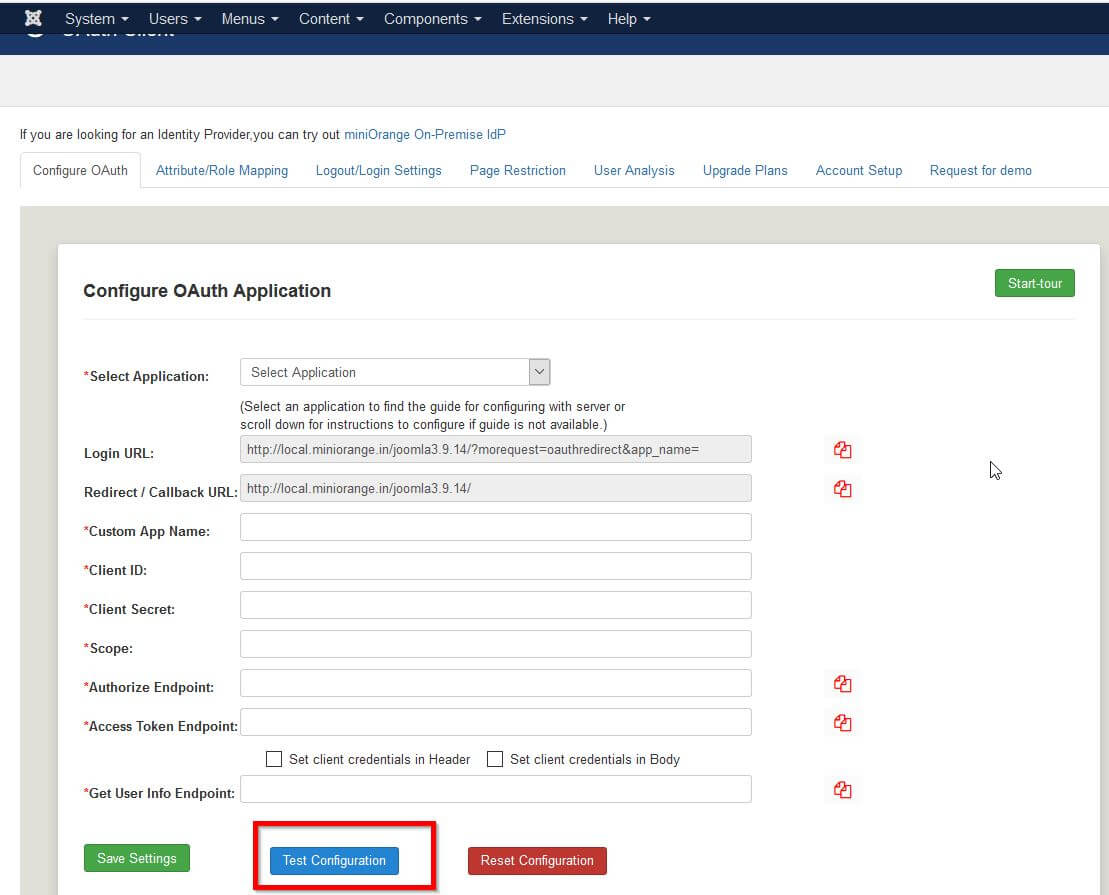
- Click on the Test Configuration button and copy the email and name attributes and save these attributes in Email Attribute and Name Attribute text field respectively. Now click on the Save Attribute Mapping button to save your configurations.
- Add a button on your site login page with the following URL:your_home_page/base_url/?morequest=oauthredirect&app_name=xxxxxxxxx
- Now logout and go to your site. You will see a login link where you placed that button.
- Click on the Licensing Plans Tab to check out our complete list of features and various licensing plans.
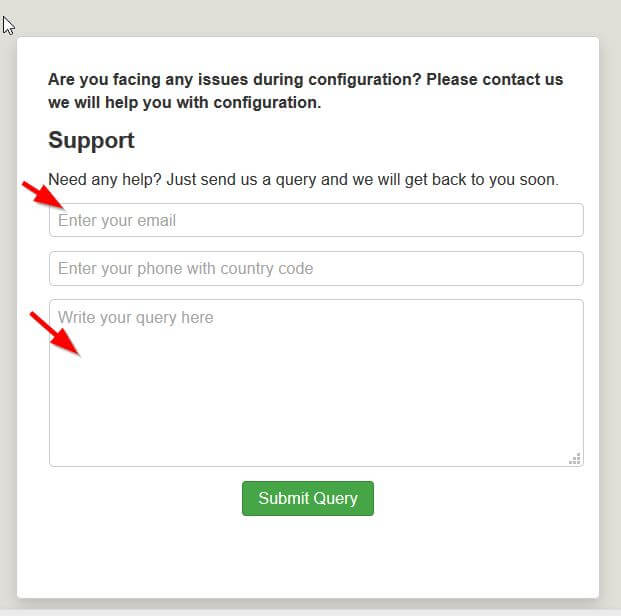
- In case, you are facing some issue or have any question in mind, you can reach out to us by sending us your query through the Support dialog box in the Account Setup and Configure OAuth tabs.
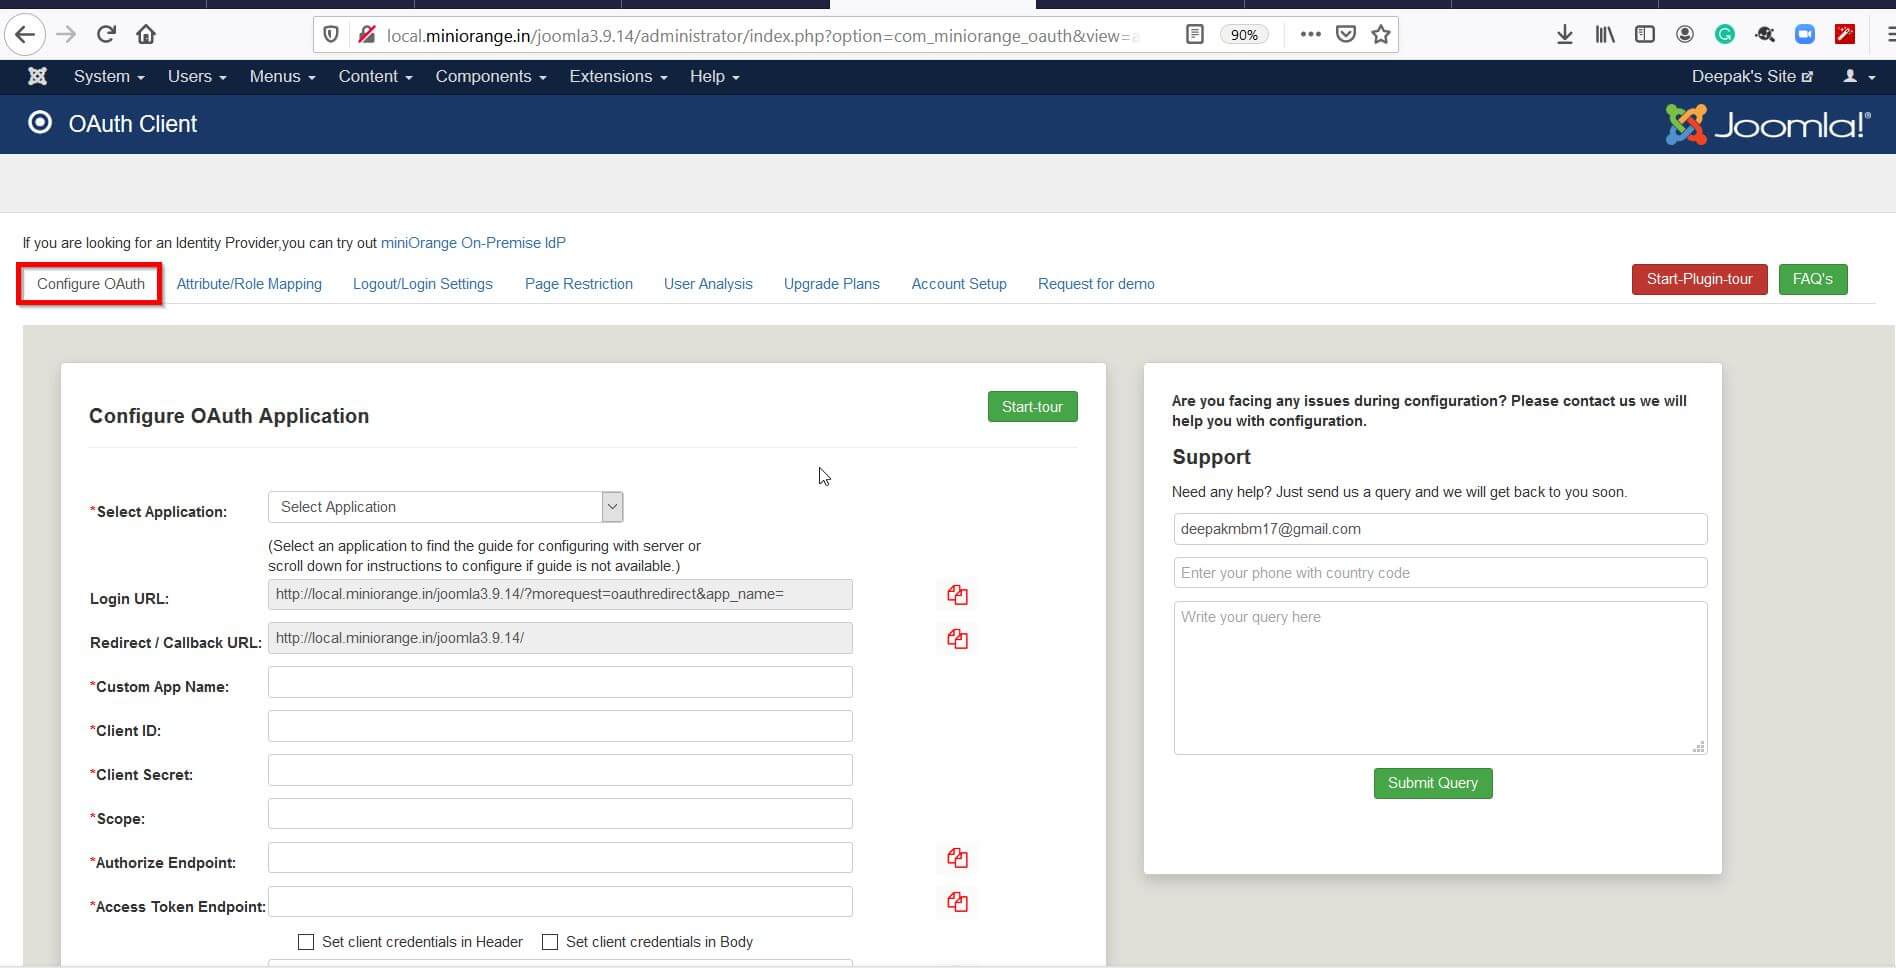
Select your OAuth Provider from the Select Application dropdown. In case your OAuth Provider is not listed in the drop down, please select Custom OAuth Provider to continue.

You would find appropriate URL in Instructions to configure in the bellow section of Attribute Mapping (After completing test configuration please choose URL and Add a button on your site login page).
In addition to the above, miniOrange also provide support for ADFS, AWS cognito, Bitrix24, Reddit, WHMCS, Square Connect, WSO2, Windows, Gigya, Dash 10, Foursquare, Harvest, MailChimp, Huddle, Ustream, Yammer, RunKeeper, SoundCloud, Pocket, Nest, Heroku, DropBox, Buffer, Hubic, Deezer, Delicious, Bitly, Mondo, Netatmo, Wechat, Weibo, Shibboleth, Invision Community, HR Answerlink/Support center, Blizzar and many more OAuth provider.
Joomla Facebook login, AWS Cognito, OpenID connect single sign-on, Reddit, single sign-on request, Joomla OAuth 2 client, Joomla OAuth2, Jooma Login module, Joomla google login , Joomla login URL, Joomla OAuth provider extensions, OAuth provider plugin for Joomla, Joomla Login, Joomla user login, OAuth, OAuth 2.0, OAuth facebook, OAuth Google, oauth2 google, login to Joomla, OAuth client authorization code , Joomla azure, Joomla API, Joomla OAuth OpenID, OAuth client -id, OAuth implicit grant, OAuth Server, OAuth2 Server, oauth2 authorization server, OpenID server, different grant types , auth0 grant types, authorization code, OAuth flows, oauth2 flow, oauth2 implicit flow, Joomla OAuth provider, client credentials grant, oauth2 flow diagram, oauth2 grant type client credentials, , authorization code flow OpenID connect, OpenID connect RFC, jwt token, auth0 jwt token, OAuth provider for Joomla, auth0 access token, OAuth provider, access token
Congratulations, you have successfully configured the miniOrange OAuth Client plugin with your desired OAuth Provider. In case you have any questions in mind, you can always mail us at [email protected].
×
![oauth provider server_sso_model]()
Hello there!
Need Help? We are right here!
