Meet us at WordCamp | ShopTalk | DrupalCon Conferences to explore our solutions. Know More
Configure Keycloak as an OAuth/OpenId Connect Server in Joomla
miniOrange Joomla OAuth/OpenID plugin gives the ability to enable OAuth/OpenID Single Sign On for Joomla site. Joomla OAuth Client plugin is compatible with all OAuth/OpenID Providers. Here we will go through a guide to configure SSO between Joomla and Keycloak. By the end of this guide, Keycloak users should be able to login and register to Joomla site.
If you have any doubts or queries you can contact us at [email protected]. We will help you to configure the plugin.
If you have any doubts or queries you can contact us at [email protected]. We will help you to configure the plugin.
Step 1: Install OAuth Client plugin. (If you have already installed the plugin, you can skip to step 2)
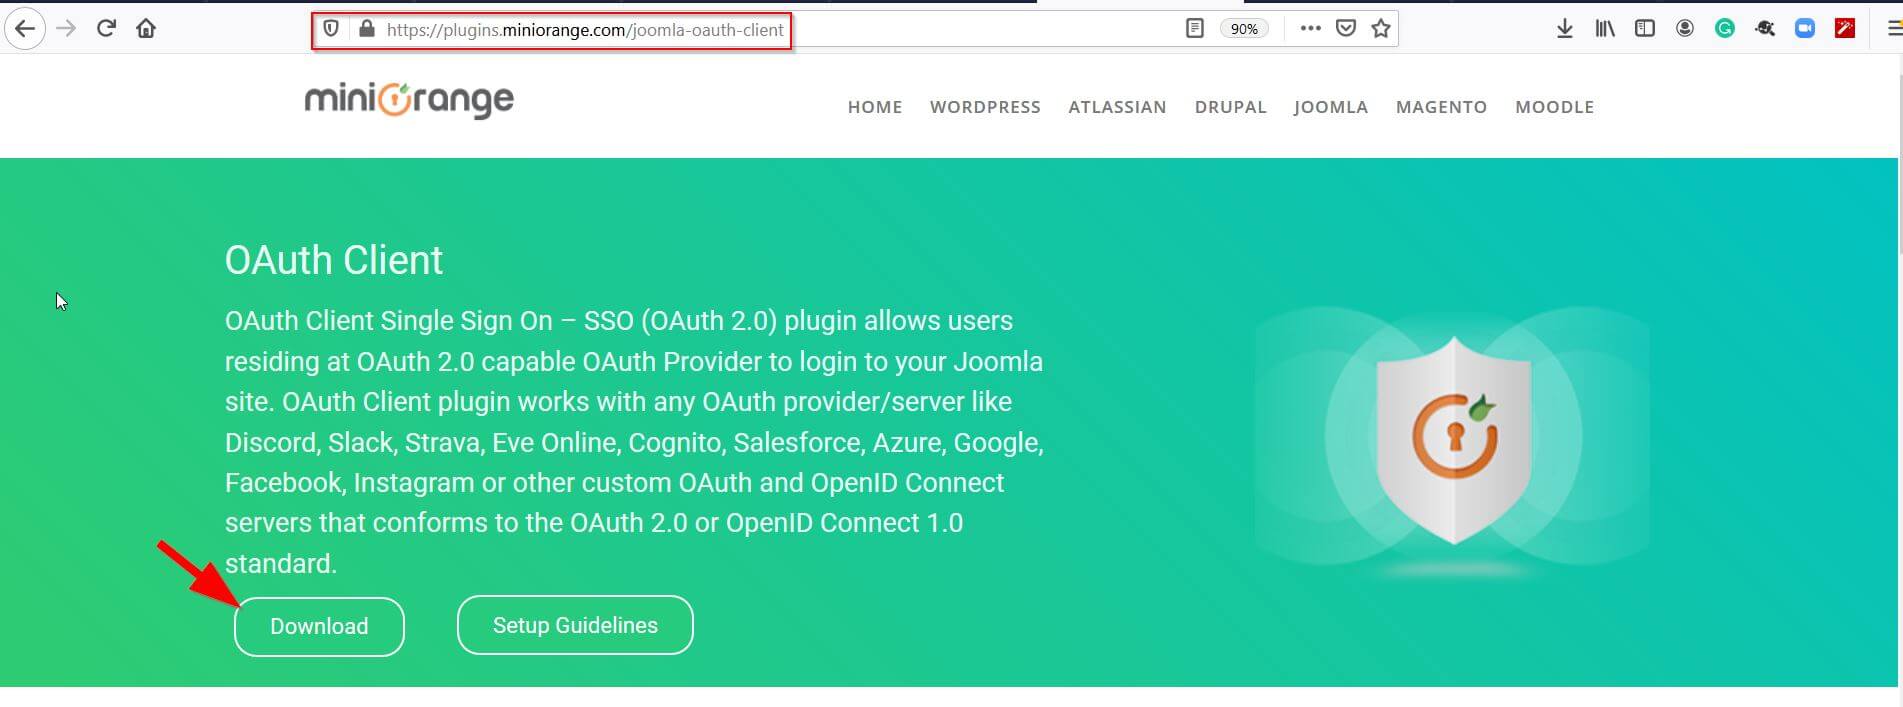
- Download the zip file of the miniOrange OAuth Client plugin for Joomla from the link here.
- Login into your Joomla site’s administrator console.
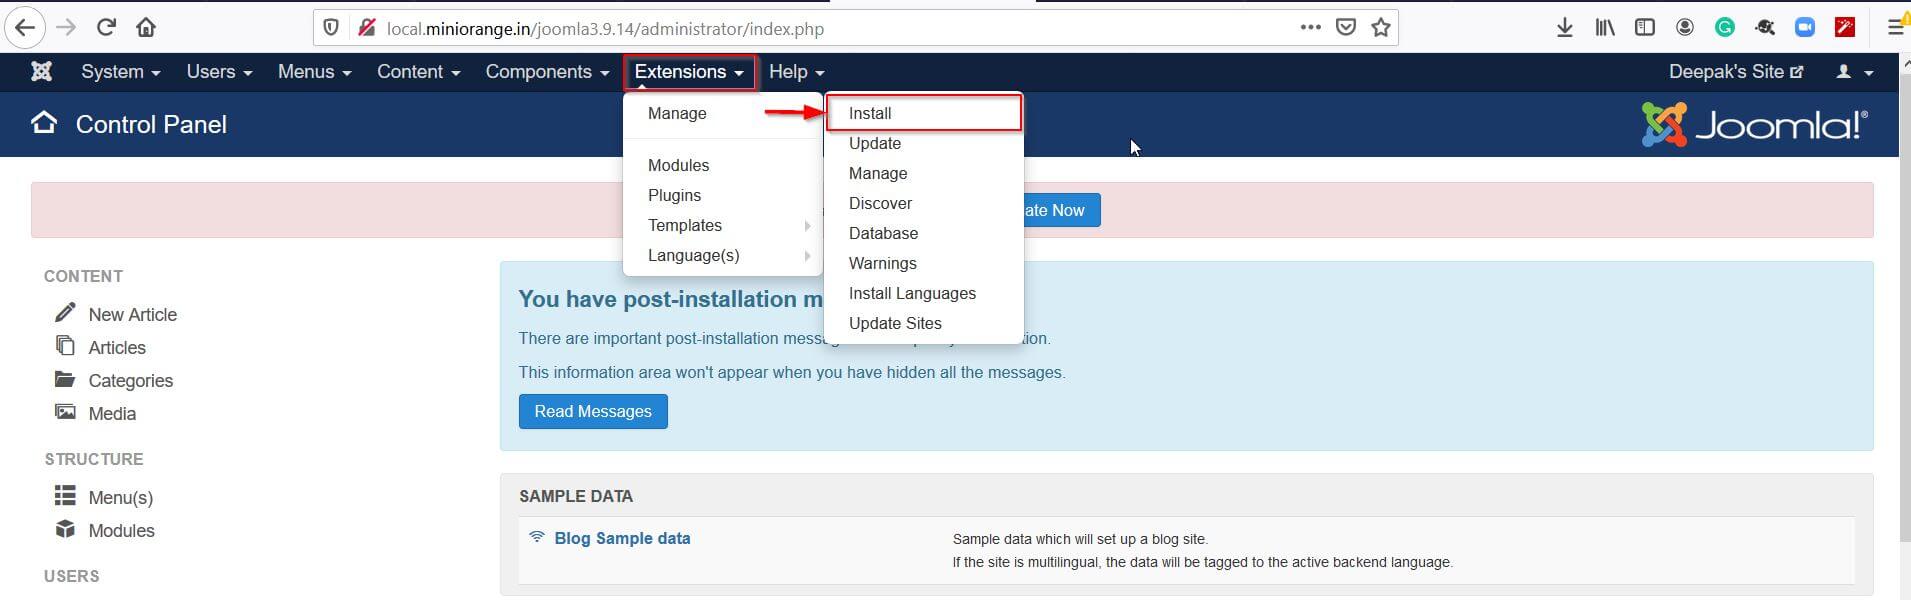
- Go to Extension Manage Install in the top navigation bar to install the plugin.
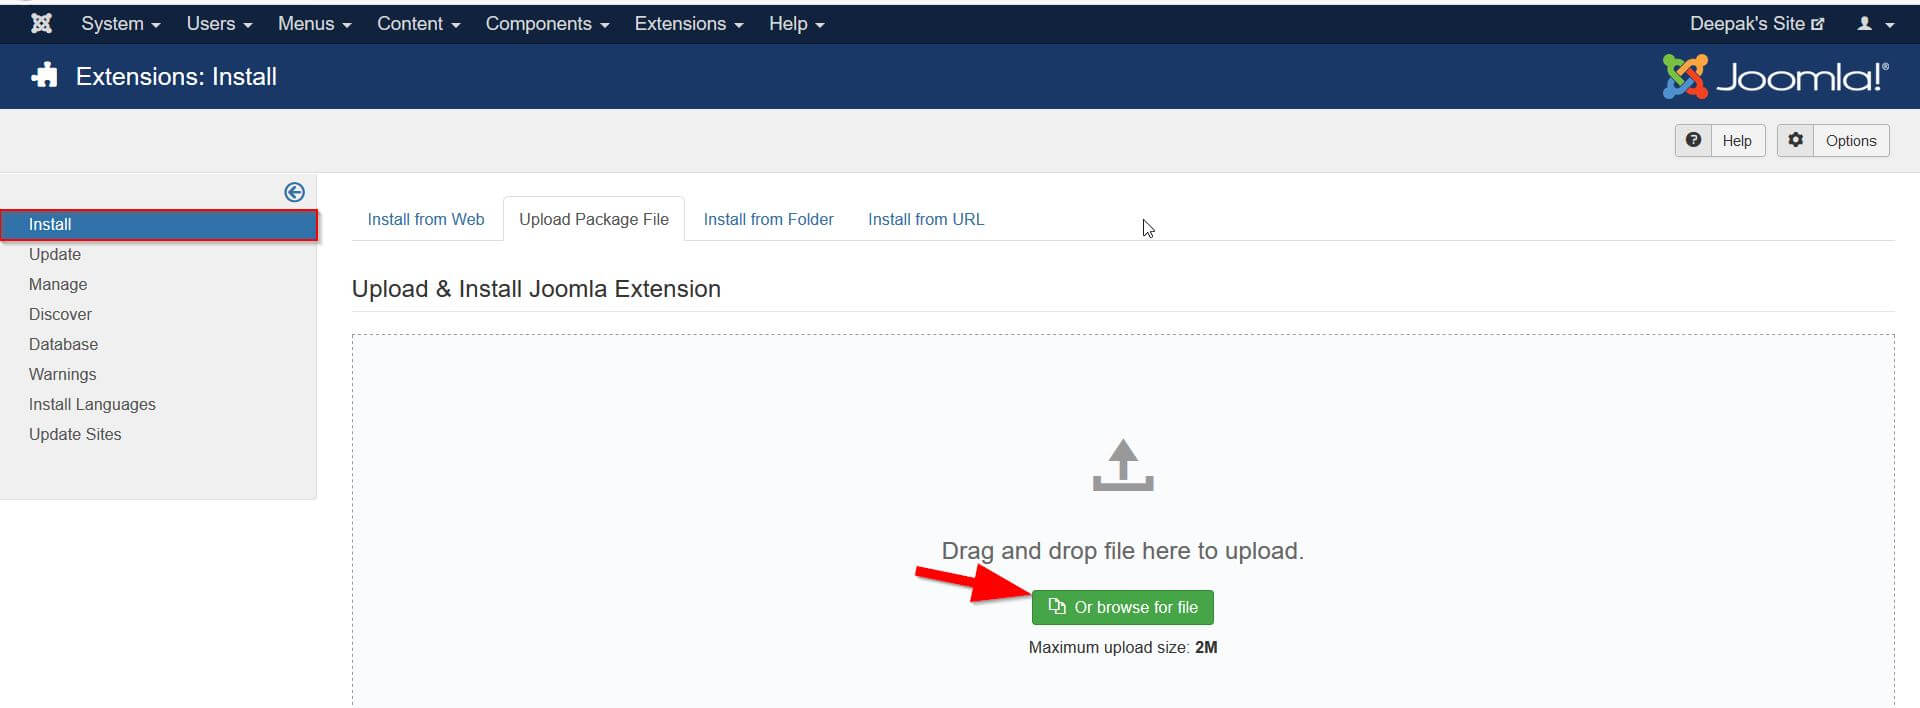
- Upload the downloaded zip file to install the OAuth Client plugin.
Step 2: miniOrange Joomla OAuth Client plugin - Callback URL
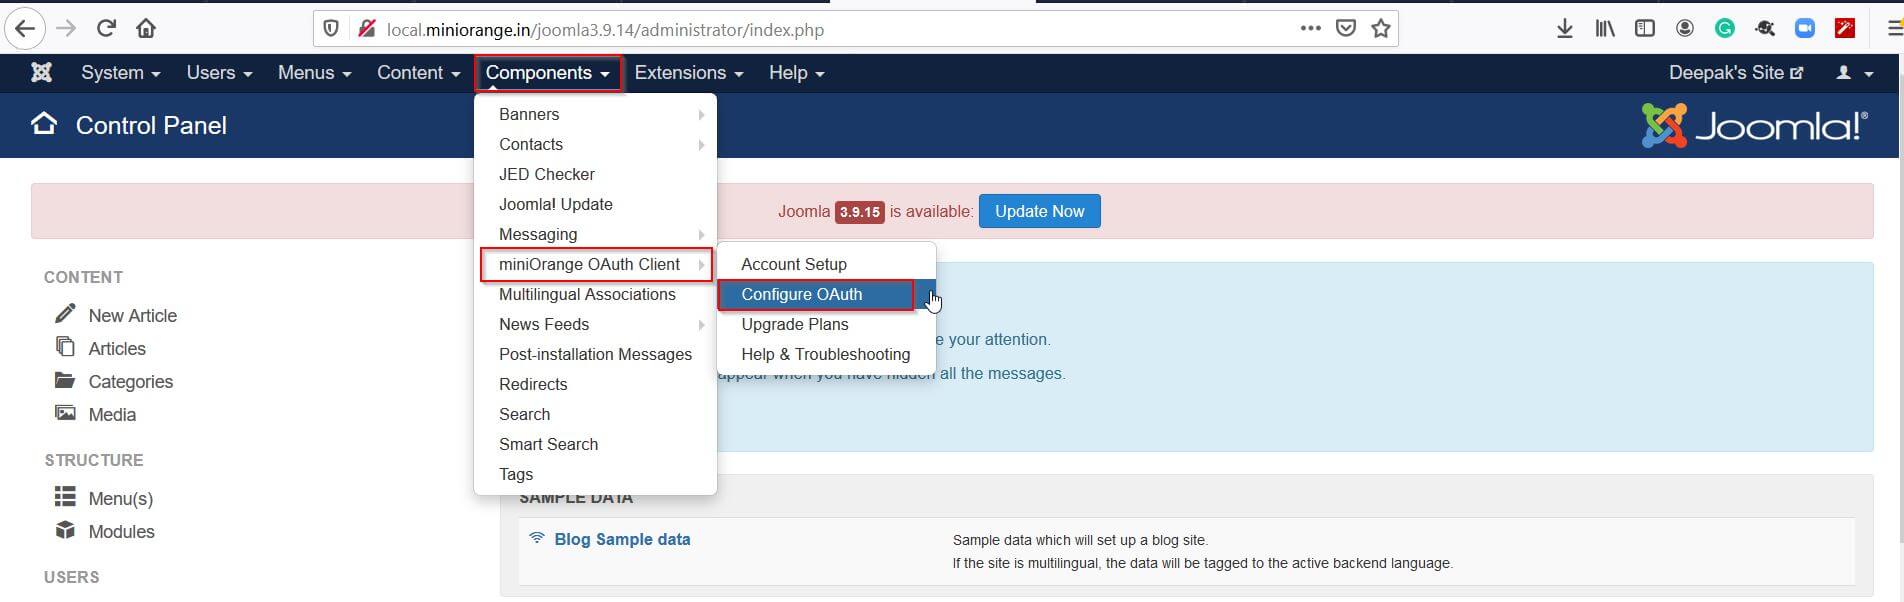
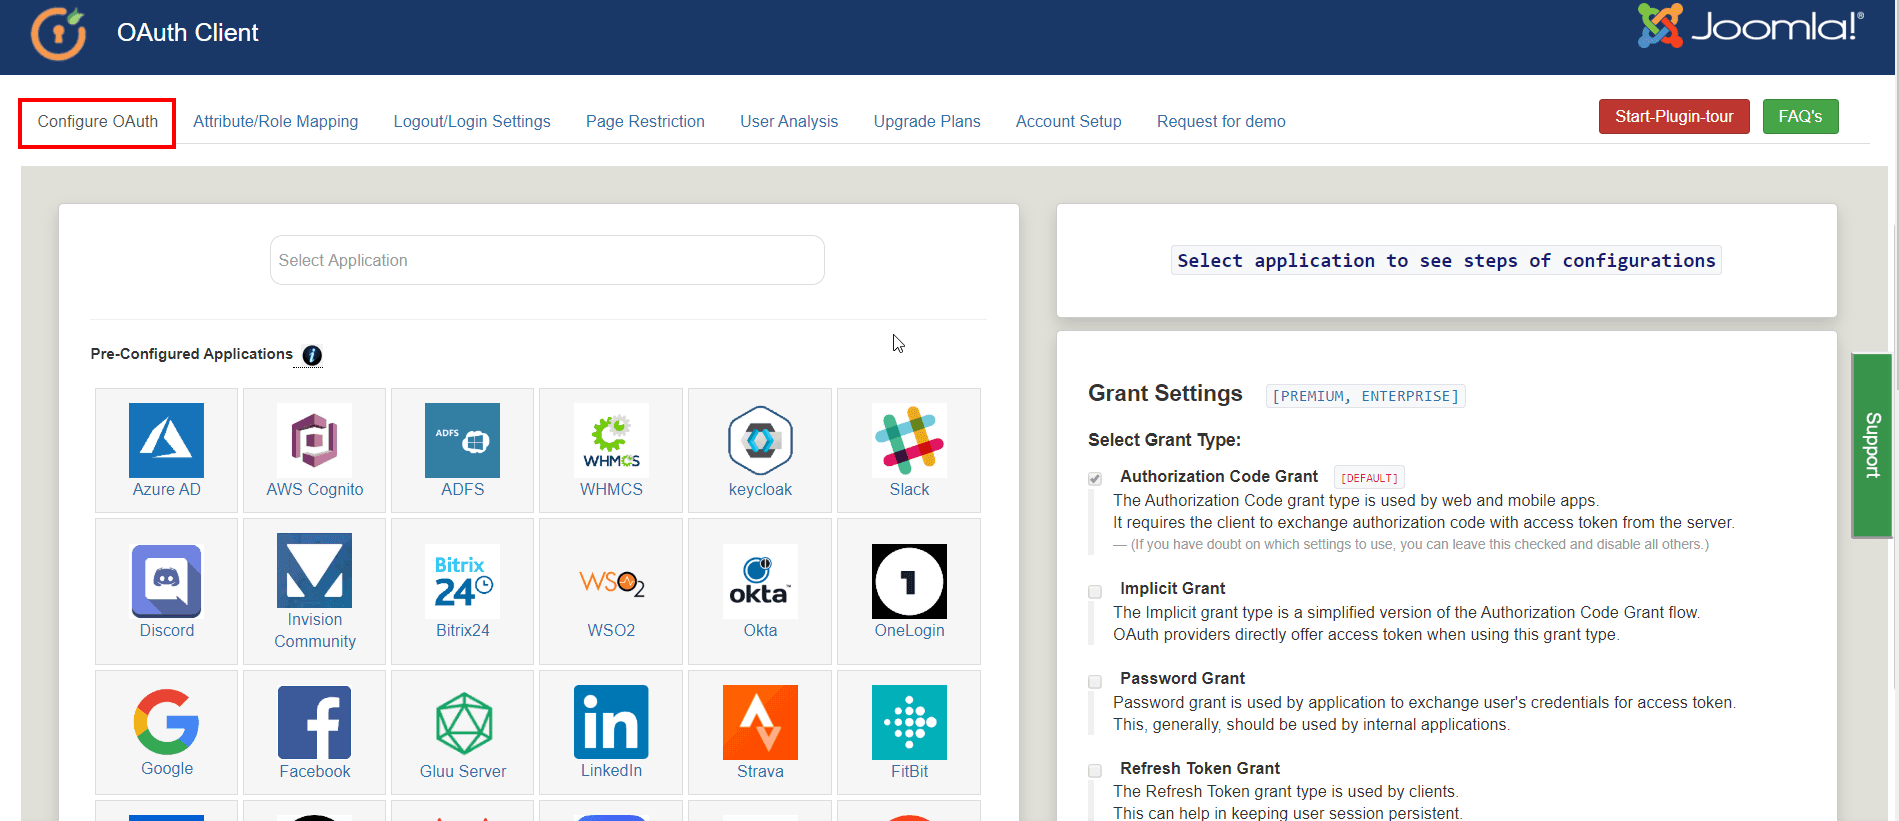
- Go to Components miniOrange OAuth Client in the top navigation bar to go to the configuration page of the plugin.
- In the Configure OAuth tab, select your OAuth/OpenID Connect provider. If your OAuth/OpenID Connect provider is not listed, you can select Custom OAuth/OpenID Connect provider to continue.
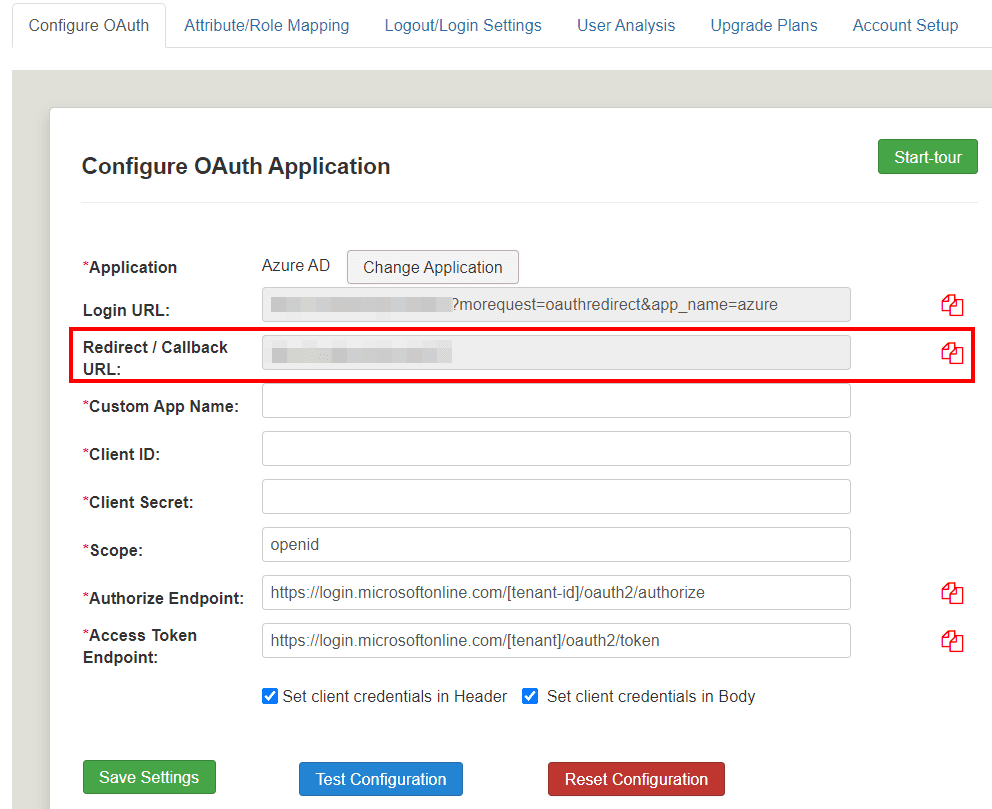
- Copy the Redirect/Callback URL given in the plugin and keep it handy because you will need it in the next step.
Step 3: Configure Keycloak as an OAuth/OpenID Connect Server.
- First of all, Download Keycloak and install it. You can also follow the guidelines to install the Keycloak server.
- Start Server: Start the keycloak server by running the _standalone.sh_ file
Root Directory of keycloak/bin/standalone.sh
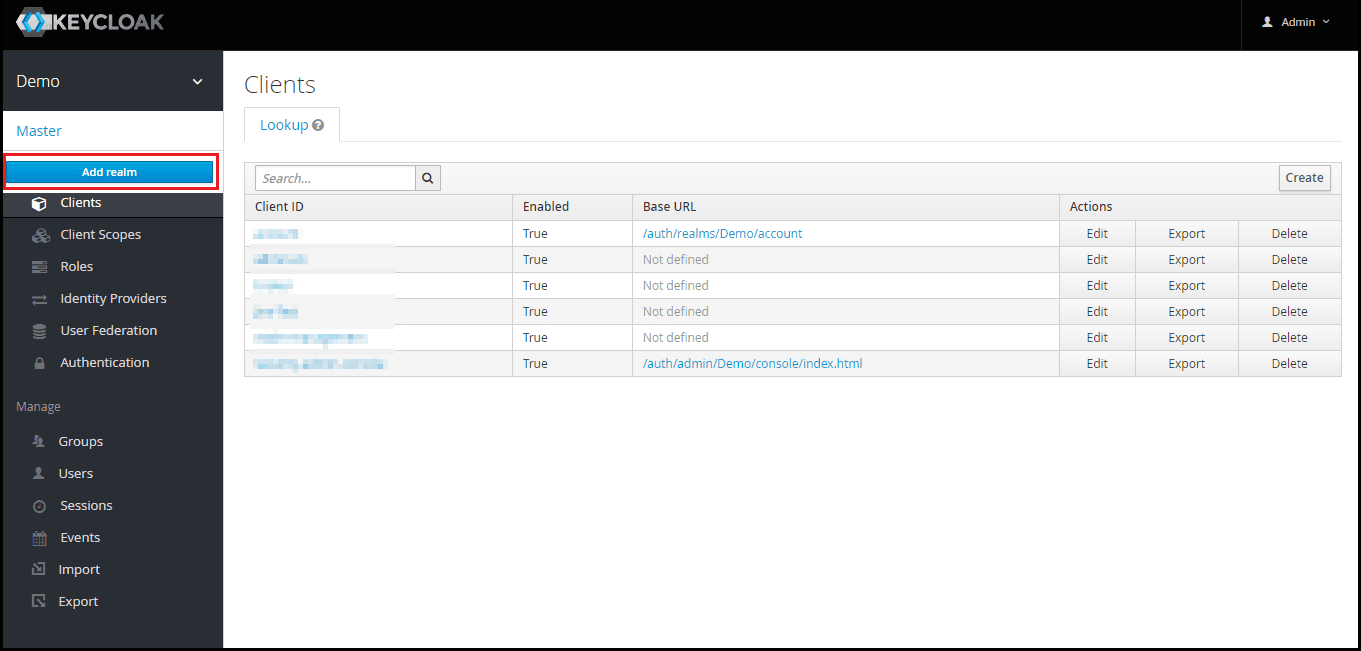
- Add Realm: Now login to keycloak administration console and navigate to your desired realm. You can add new realm by selecting Add Realm option.
- Create Realm: Enter Realm Name and click on CREATE to add realm.
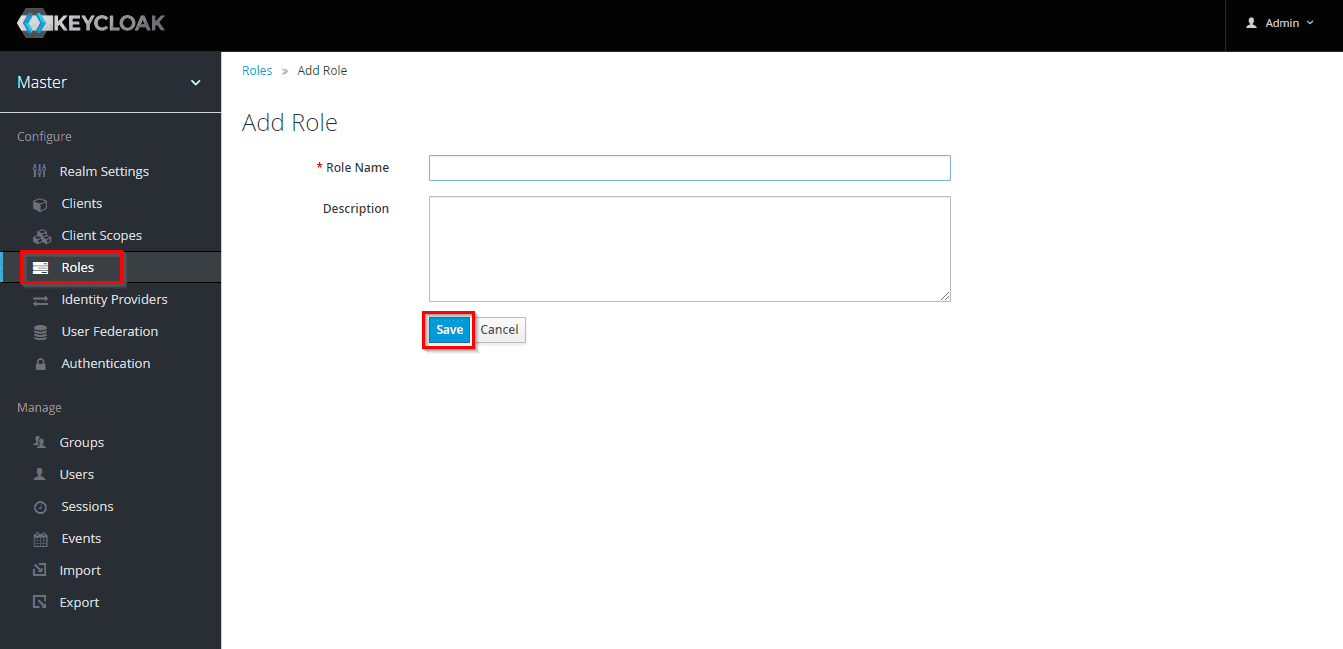
- Create Role: The Role will be used by your applications to define which users will be authorized to access the application. Click on the Roles and choose Add Role.
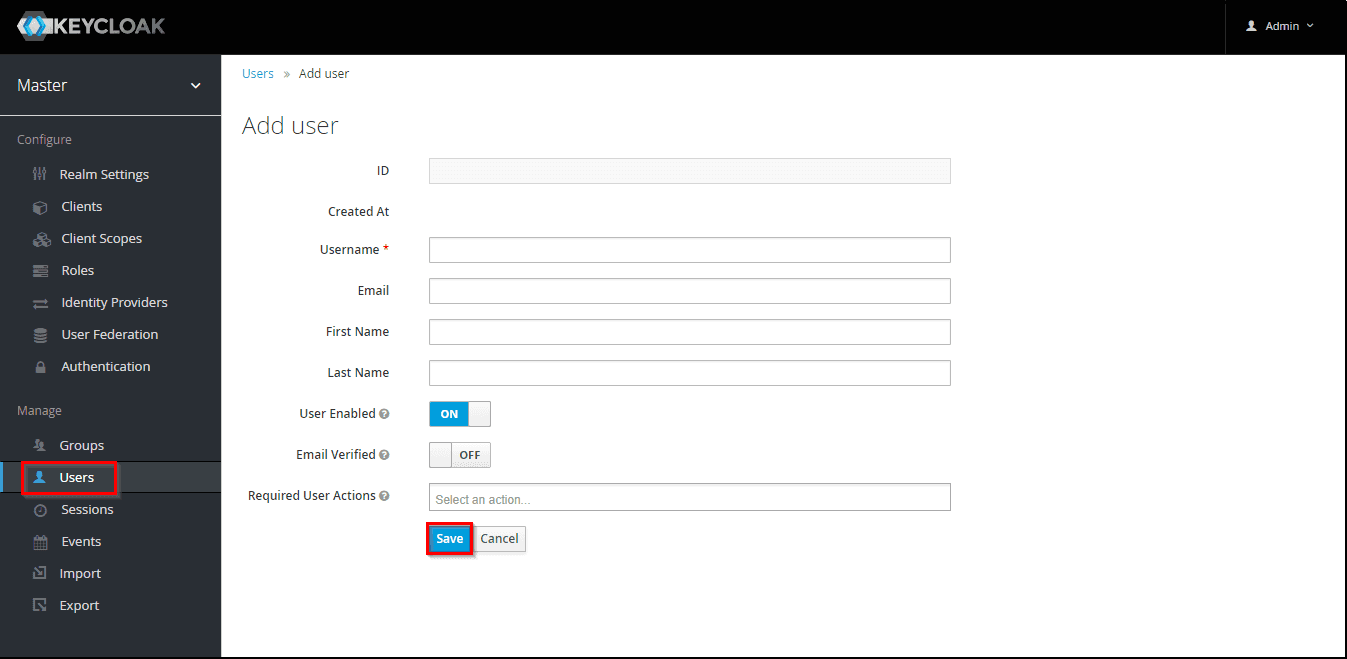
- Add User: We need to add users to realm who will be able to access the resources of realm. Click on the Users and choose to Add a new User.
- User Configuration: After user is created following action needs to be performed on it.
- Setting a password for it so click on Credentials and set a new Password for the user.
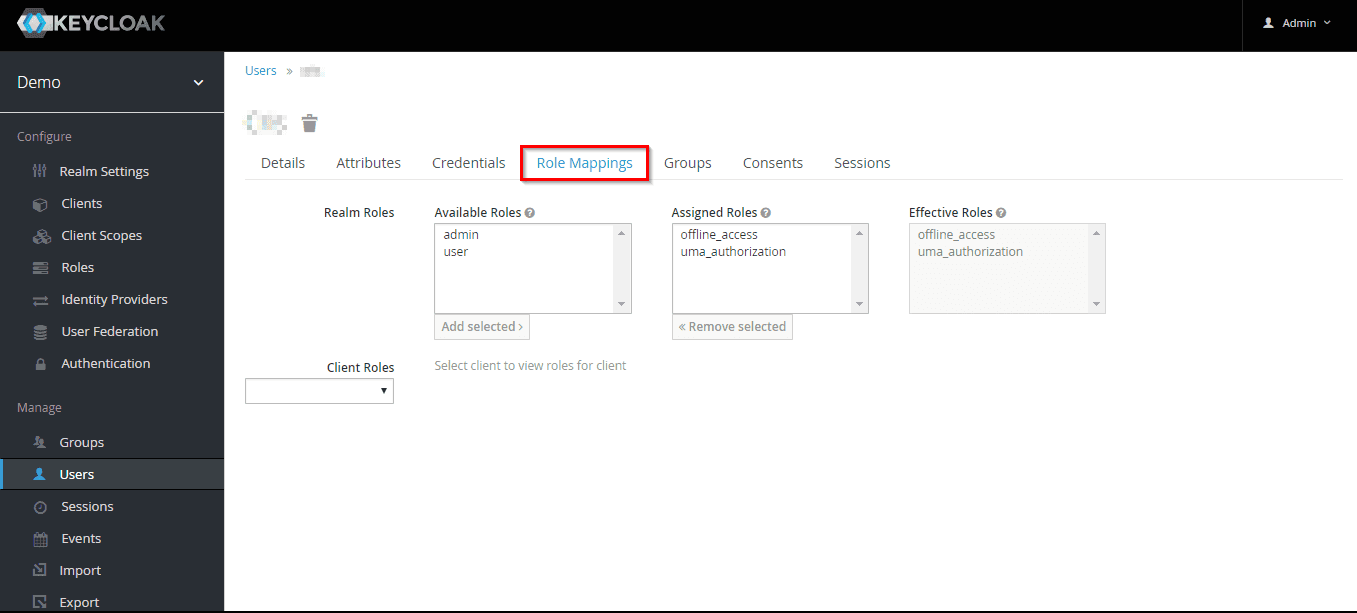
- Map User: We need to map user to a role. Click on Role Mappings and assign the user desired role from available roles and clicking on add selected.
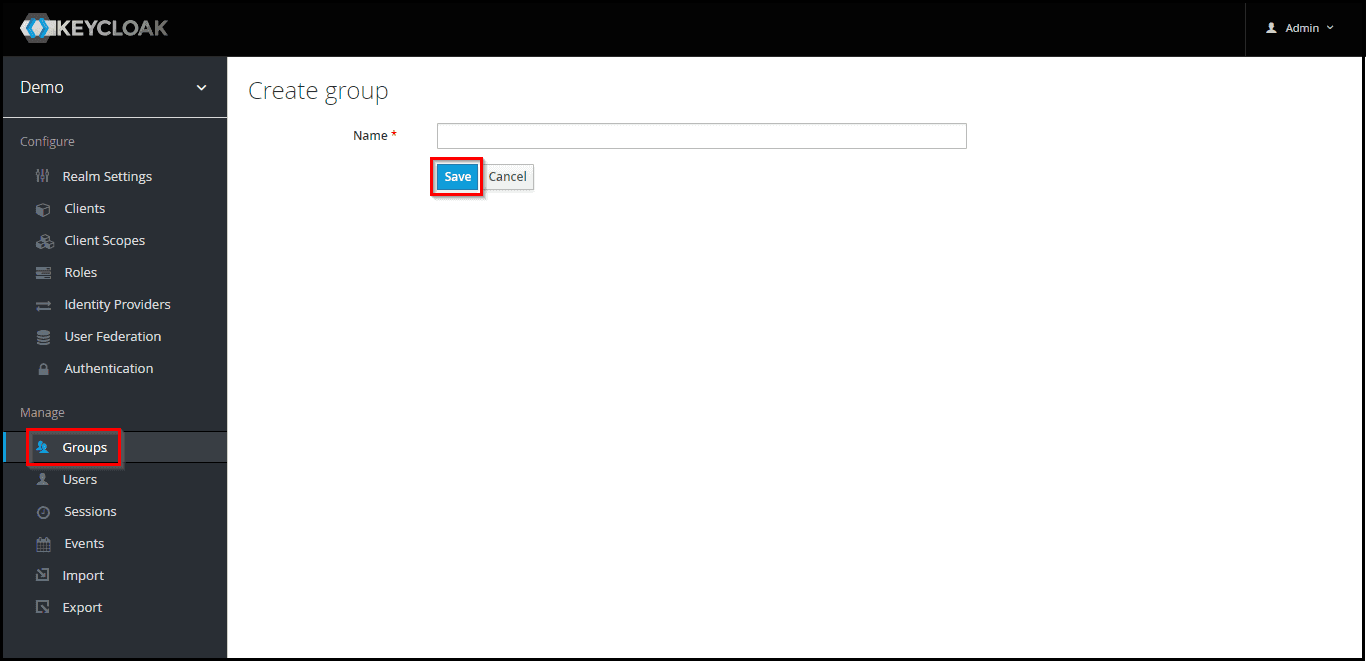
- Create groups: Click on the Groups and choose New to create a new group.
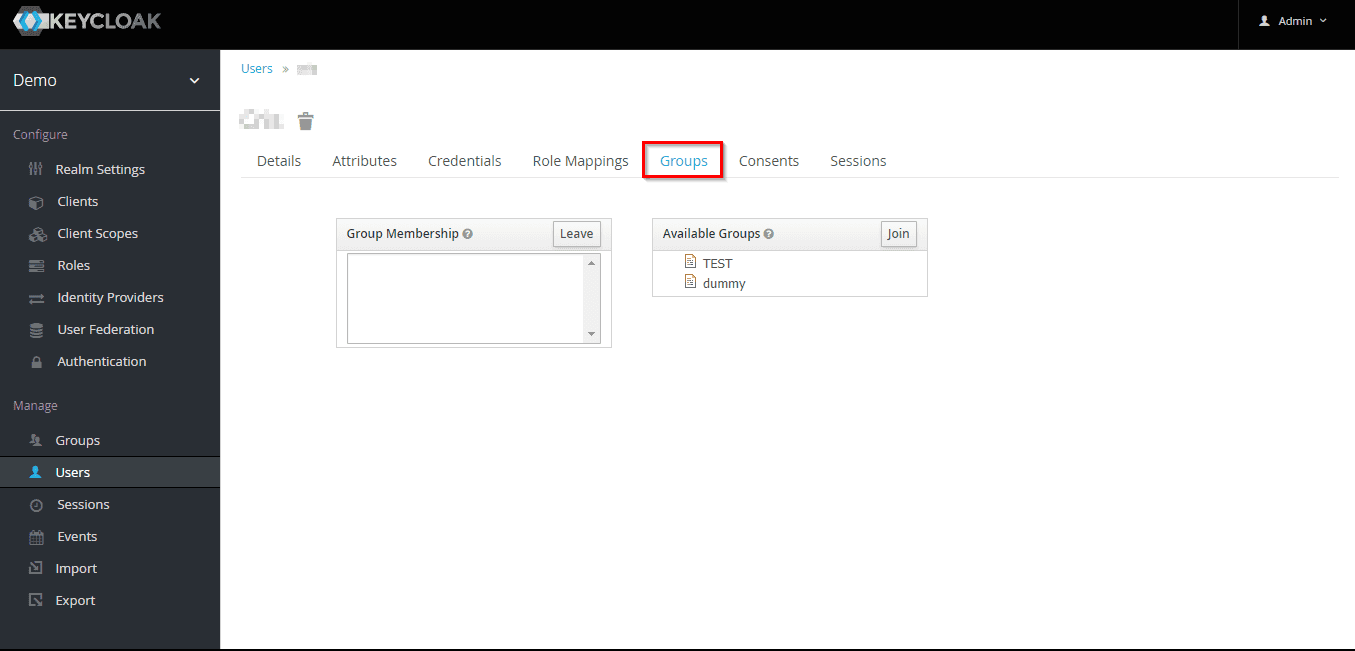
- Assign user to group: Select the user whom you want to add in group. Choose Groups option from tab and then select the group-name and click on join.
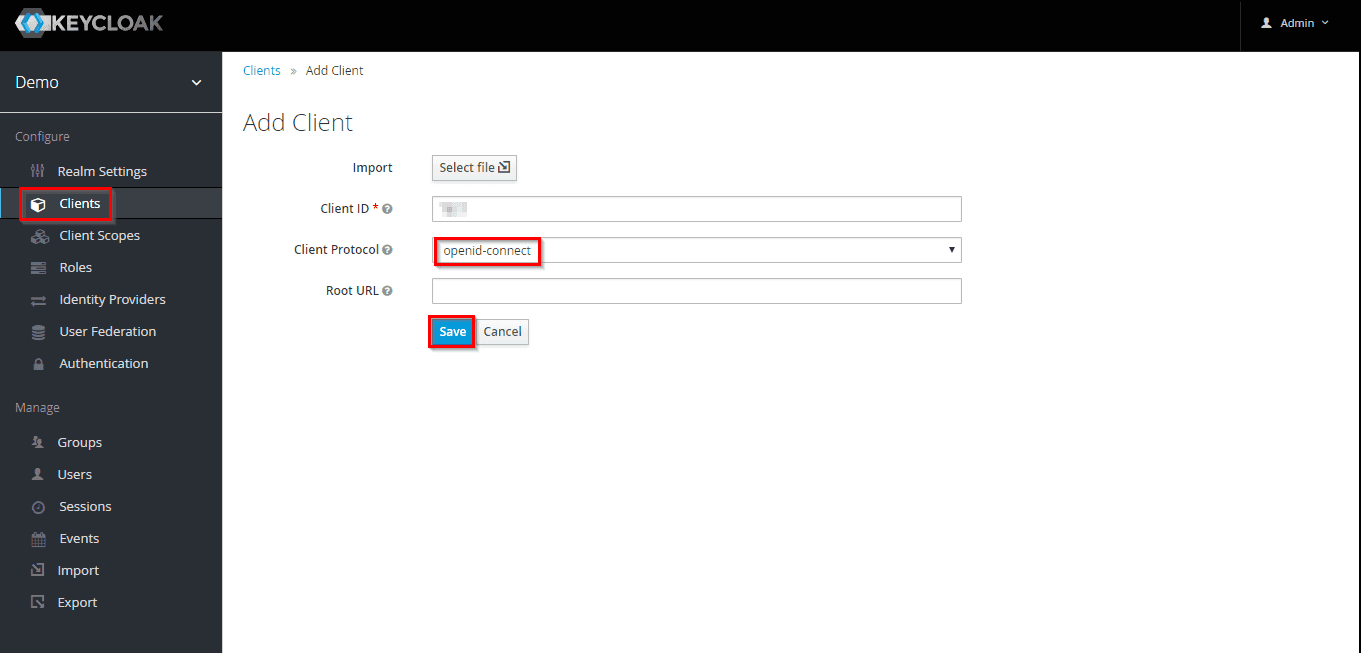
- Create OpenID client: Click on the Clients and choose create to create a new client. Enter any random string as Client ID and keep it handy because you will need it in the next step. Select client protocol openeid-connect and select Save.
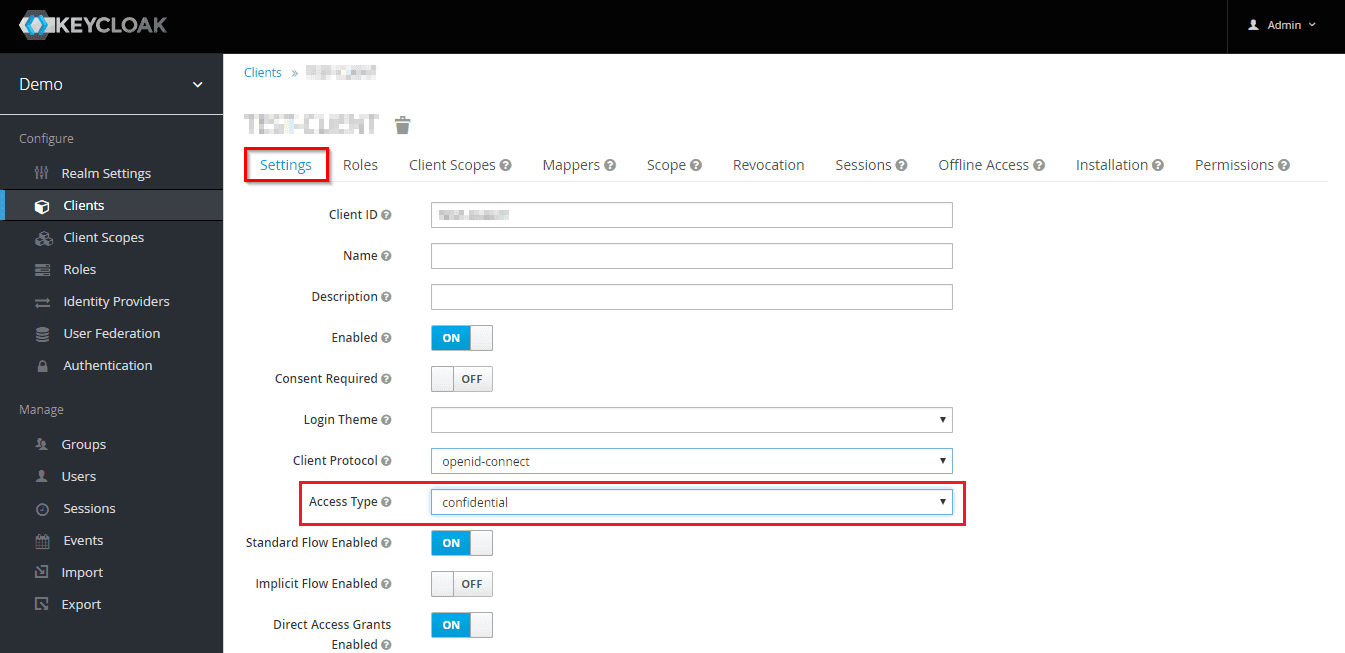
- Enter Change Access Type: Afterclient is created change it's access type to confidential
- Enter Valid Redirect URLs: Copy callback URL (Enter from miniOrange Oauth Client plugin which you copied in the last step) in the last step and then click on SAVE.
Ex -- https://oauth/callback - Keycloak Group Mapper: Now to get group details we need to perform its client mapping with group membership else group details will not be fetched. So in client select Mappers and then click on create. Select mapper type Group Membership and enter name and token claim-name i.e the attribute name corresponding which groups will be fetched and click on Save
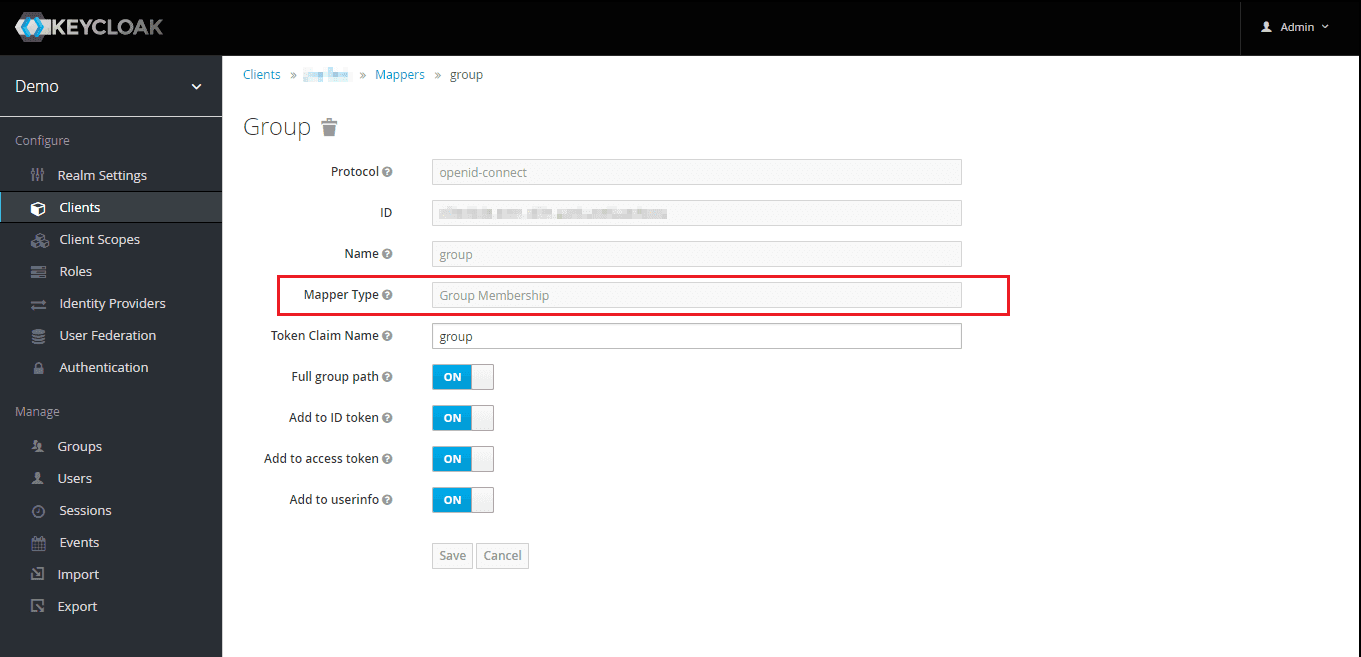
Note: -- If full path is on group path will be fetched else group name will be fetched.
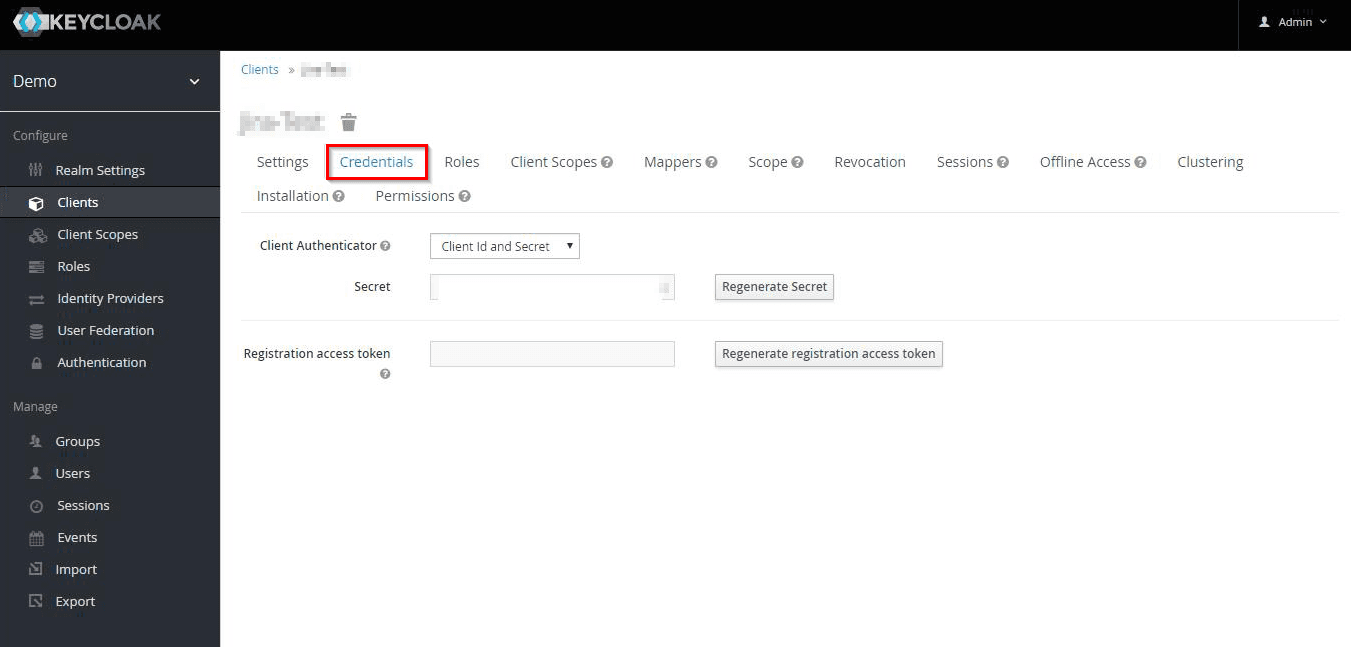
- Get Client Secret: Now we need to get client secret. So select Clients and select credentials and copy your secret from here.
- You have successfully completed your Keycloak OAuth Server side configurations
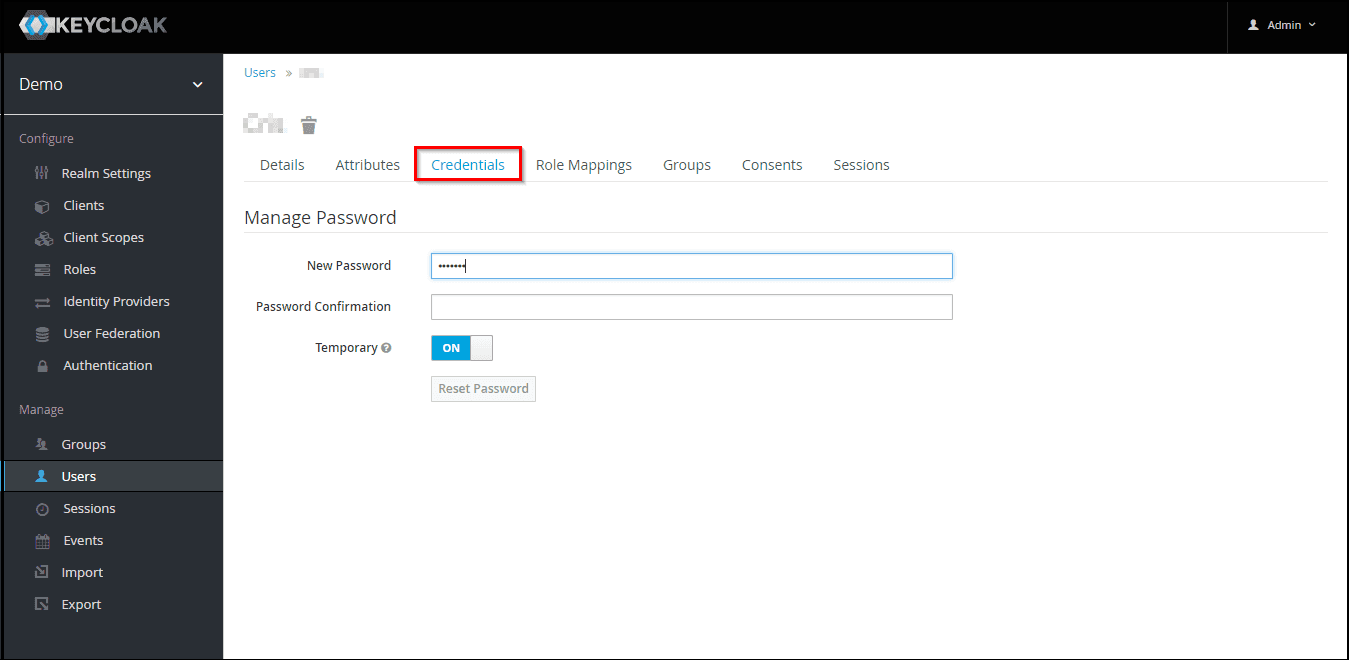
NOTE : Disabling Temporary will make user password permanent
| Scope: | email profile |
|---|---|
| Authorize EndPoint: | <Keycloak base URL>/realms/{realm-name}/protocol/openid-connect/auth |
| Access Token Endpoint: | <Keycloak base URL>/realms/{realm-name}/protocol/openid-connect/token |
| Get User Info Endpoint: | <Keycloak base URL>/realms/{realm-name}/protocol/openid-connect/userinfo |
Step 4: Configure miniOrange Joomla OAuth Client plugin.
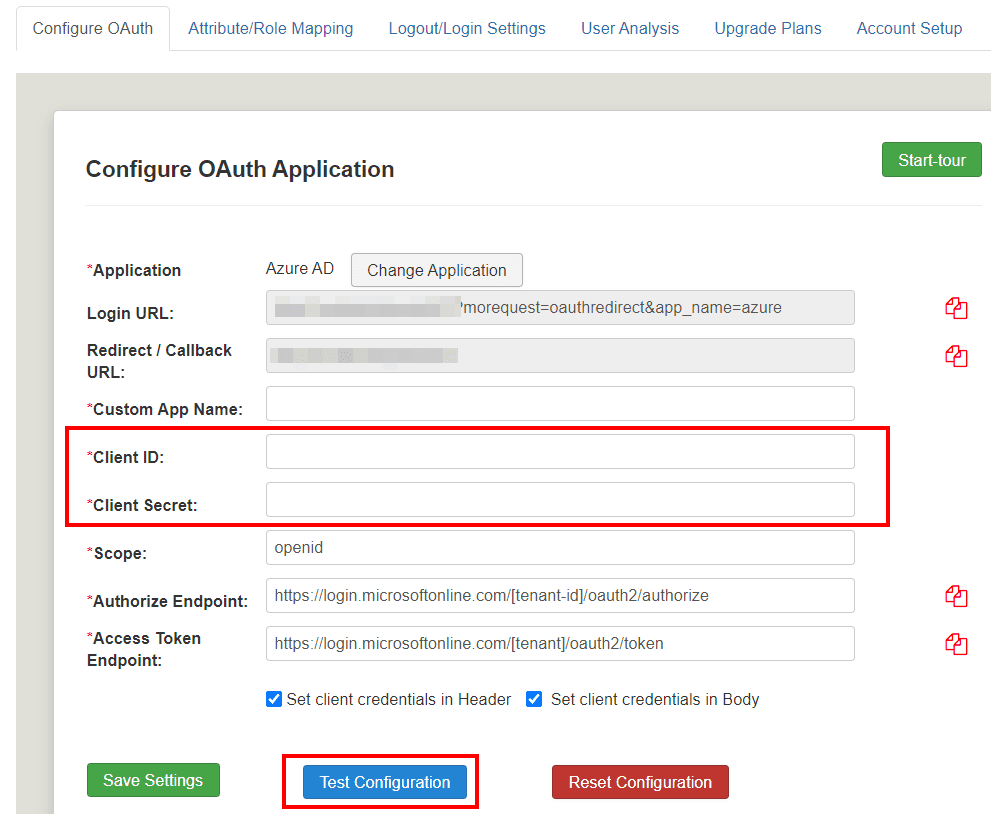
- Paste the Client ID and Client Secret which you copied in the last step and save it in the respective fields and then click on the Test Configuration button.
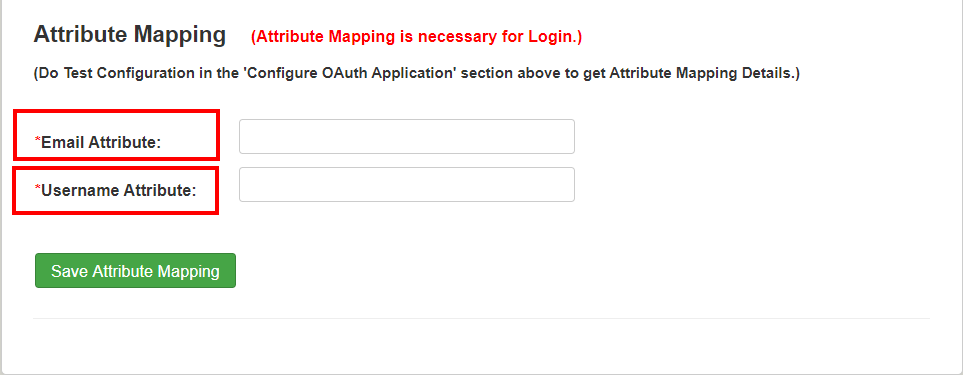
- Now copy the email and name attributes you got in the test configuration and save these attributes in Email Attribute and Username Attribute text field respectively. Now click on the Save Attribute Mapping button to save your configurations.
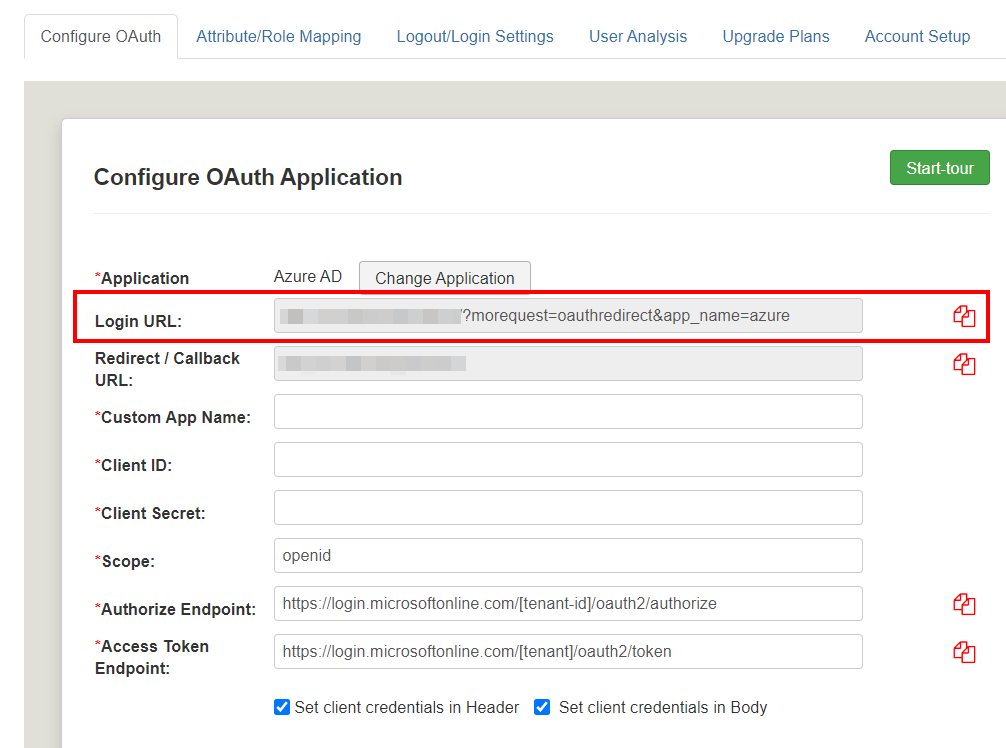
- You would find appropriate URL for performing the SSO after selecting the OAuth/OpenID Connect provider in the Login URL field (After completing test configuration please copy the Login URL and Add a button on your site login page).
- Now logout and go to your Joomla site's pages where you have added this link. You will see a login link where you placed that button.
- Congratulations, you have successfully configured the miniOrange OAuth Client plugin with your desired OAuth Provider.
- Click on the Upgrade Plans tab to check out our complete list of features and various licensing plans.
- If you want to purchase any of the paid version of the plugin, you have to register/login with us in Account Setup tab.
- In case, you are facing some issue or have any question in mind, you can reach out to us by sending us your query through the Support button in the plugin or by sending us a mail at [email protected].
×
![Keycloak]()
If you are looking for anything which you cannot find, please drop us an email on [email protected]
Hello there!
Need Help? We are right here!
